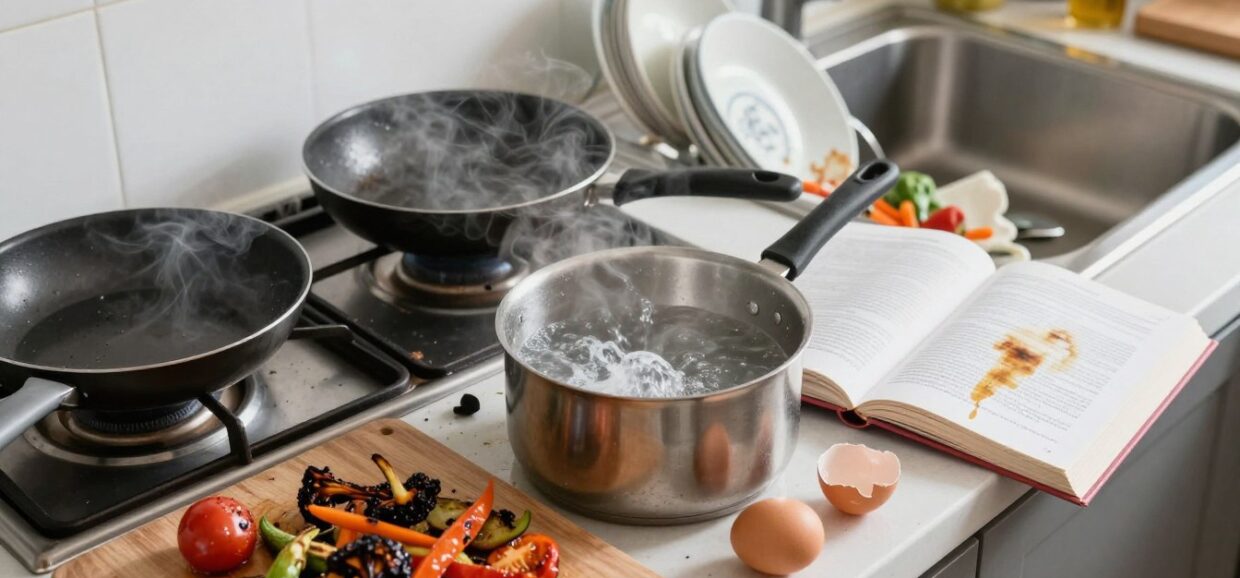
I remember the early days in my kitchen all too well. A cloud of smoke from burnt garlic, a sad, over-salted soup—these were my teachers. That feeling of frustration is something I believe many new home chefs share. It’s a personal rite of passage.
On February 24, 2025, I refreshed this guide. My goal is to ensure every piece of advice here is current and reliable for your culinary journey. I’ve been in your shoes, and I want to help you skip the worst of those early stumbles.
Understanding why food behaves a certain way changed everything for me. It turns the kitchen from a place of guesswork into a space for confident creation. This knowledge lets you experiment with new recipes without fear. You can achieve consistent, delicious results in every dish you make.
Key Takeaways
- Personal experience with kitchen errors provides valuable lessons for all beginners.
- This guide was updated in February 2025 for the most accurate culinary information.
- Avoiding frequent pitfalls accelerates your path to becoming a better cook.
- Learning the basic science behind food transforms your entire approach to meals.
- Building confidence is key to trying new recipes and techniques.
- Mastering fundamentals leads to consistent quality in your daily dishes.
- Every home chef has the potential to elevate their cooking with the right knowledge.
Introduction: My Journey with Kitchen Mishaps
My culinary path began with a series of mishaps that taught me more than any recipe book could. I experienced many errors while developing my skills in a busy professional kitchen. Simple dishes often led to surprising results that left me frustrated.
I soon realized each blunder was a valuable lesson. It helped me refine my technique and improve my overall abilities. Feeling overwhelmed at the start is completely normal.
Persistence became my key to mastering the art of preparing food. Even a seasoned chef can face hurdles with a complex new recipe. I want to help you navigate these early challenges.
You can spend less time worrying and more time enjoying your meals. The table below outlines some early hurdles I faced and the insights I gained.
Early Hurdle
Typical Outcome
Key Takeaway
Rushing Simple Recipes
Burnt or undercooked food
Slow down and follow each step
Ignoring Prep Work
Chaotic and stressful process
Mise en place is essential for flow
Fear of Seasoning
Bland, unexciting dishes
Taste and adjust confidently
These experiences shaped my approach in the kitchen. They turned initial frustration into a foundation for growth. Every home chef has the potential to learn and evolve.
Common Cooking Mistakes in the Kitchen
Many new home chefs find themselves repeating the same handful of errors. Spotting these issues early makes a huge difference.
You can ensure every meal turns out just right. I struggled with them too when I was learning.
Problems like using the wrong burner temperature or skipping recipe steps are frequent. They can turn a fun project into a frustrating one.
By learning to manage these pitfalls, you change your entire experience. Preparing food becomes a creative and rewarding hobby instead of a chore.
My goal is to help you sidestep the frustration of a ruined effort. The table below breaks down a few typical issues and their solutions.
Frequent Error
Typical Result
Simple Fix
Not Preheating the Pan
Food sticks and cooks unevenly
Wait for the pan to get properly hot first
Constant Stirring or Flipping
Prevents browning and creates steam
Let food sit undisturbed to develop a crust
Guessing on Seasoning
A bland or overly salty dish
Taste your food and adjust in small amounts
Every skilled chef once learned these same basic techniques. You are building a foundation for fantastic results.
Miscalculating Meat Temperature: Why an Instant Read Thermometer Matters
I learned the hard way that guessing a roast’s doneness is a recipe for disappointment. Relying on sight or touch led to inconsistent results every time. An instant-read thermometer changed that completely.
Understanding Carry-Over Cooking
Meat continues to cook after you remove it from heat. This is called carry-over cooking. The internal temperature keeps rising.
I once cooked a 5lb New York Strip Roast at 200°F for three hours. When I took it out, the thermometer read 126°F. Minutes later, it climbed to 131°F before slowly dropping.
The Difference Between Guessing and Precision
Every piece of meat has a different density and shape. Your cooking time must adjust based on the actual temperature, not a clock.
Precision is vital for perfect results. A small variation in internal temperature drastically changes your meal’s quality. You should never guess.
Using a thermometer ensures your cooking process is controlled. It takes the stress out of determining the right cooking time.
The Importance of Letting Meat Rest for Juicy Results
The secret to a perfectly juicy piece of meat isn’t just in the cooking; it’s in the waiting. I learned this after many disappointing meals where my steaks and roasts turned out dry. Letting meat rest allows the internal juices to redistribute evenly.
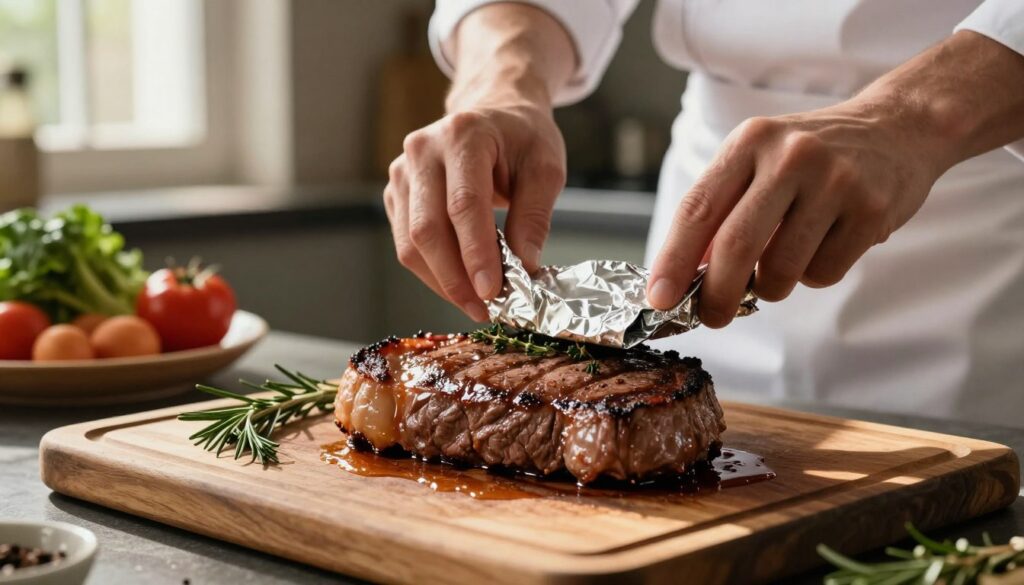
If you cut into meat right away, the internal liquid—called myoglobin—rushes out. This leaves the meat tough and less flavorful. Allowing it to sit gives the proteins time to relax and reabsorb that moisture.
Resting Times for Different Cuts
A standard 12oz steak needs at least 15 minutes of rest. For larger roasts, I often wait nearly an hour. This patience is a crucial part of the process.
The final result is a juicier, more tender meal. That red liquid on your plate is not blood; it’s precious flavor that should stay inside. Proper resting transforms your dining experience.
Burning Butter: How to Sauté Without the Scorch
The acrid smell of scorched butter is a kitchen alarm I’ve learned to heed. Sautéing should create a golden, flavorful foundation, not a bitter, blackened mess. The key lies in knowing what’s in your butter.
Understanding the Role of Milk Solids
Butter contains water, butterfat, and milk solids. Those milk solids are the culprits. They begin to burn at temperatures between 200°F and 250°F in a hot pan.
Butterfat itself has a much higher smoke point of 485°F. Many think mixing butter with olive oil helps, but the milk solids will still burn. This prevents proper browning.
Using Clarified Butter for High Heat Cooking
To achieve a good sear, you need temperatures between 310°F and 360°F. Clarified butter is the solution. It’s pure butterfat with the milk solids removed.
I often buy it at Trader Joe’s. It can withstand high heat up to 485°F without burning your food. Using the wrong fat in your pans creates acrid flavors.
For searing meat or any high heat cooking, clarified butter delivers that rich, buttery taste without the risk of a scorched pan.
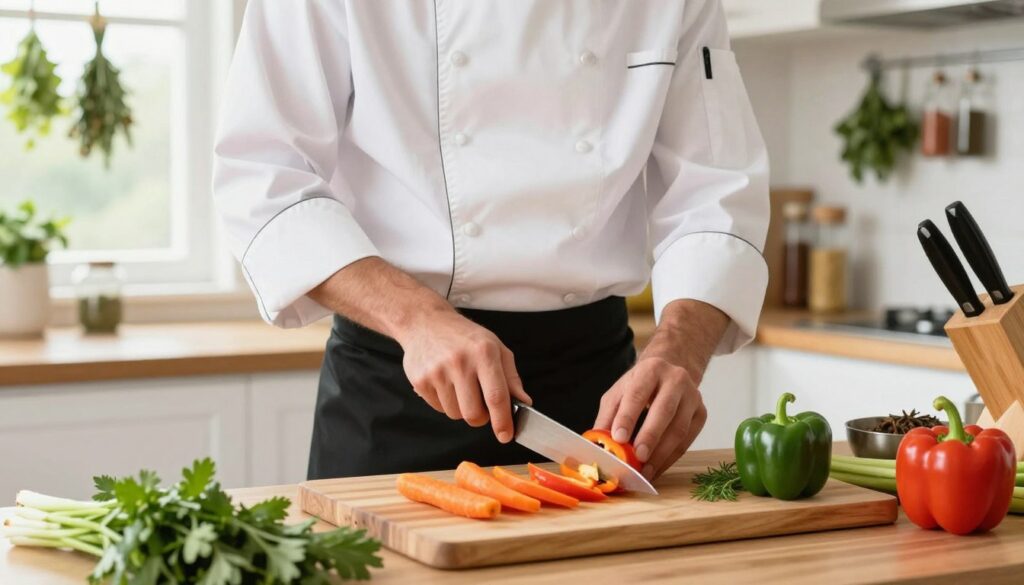
Essential Knife Skills for a Safer, Better Prep
Confidence with a blade transformed my kitchen experience from chaotic to controlled. Good skills with this tool make your food prep faster and much safer. It’s a fundamental step every home chef should master.
Keeping Your Knives Sharp
A sharp knife is safer than a dull one. It requires less force, giving you better control. This is the best way to prevent slips.
Regular maintenance is key. Use a honing steel to realign the blade’s microscopic teeth. Hold it at a steady 20° angle.
For a truly dull edge, a sharpening stone creates a new one. I use a 400/1000 grit stone weekly. It keeps my blades performing perfectly.
Mastering the Proper Knife Grip
How you hold your knife matters most. The blade grip means choking up on the handle. Your thumb and forefinger pinch the blade.
This grip offers superior precision and stability. It makes every cut feel intentional and secure. You guide the knife instead of forcing it.
Learning to sharpen your tools has a bit of a learning curve. The effort pays off with drastic improvements in kitchen efficiency. The table below compares the core maintenance tools.
Tool
Primary Purpose
Best For
Key Angle
Honing Steel
Realigns the blade’s edge
Daily or weekly upkeep
20°
Sharpening Stone
Creates a new cutting edge
Restoring a dull blade
Varies by stone
Investing time in these skills builds a solid foundation. Your prep work becomes a smooth, enjoyable part of the process.
Avoiding Garlic Burn: Timing Your Sauté Perfectly
Garlic’s transition from fragrant to foul is a matter of seconds, a lesson I learned through several acrid-tasting meals. Its delicate nature means it can’t withstand prolonged exposure to high heat. Getting the timing right is crucial for building a flavorful foundation.
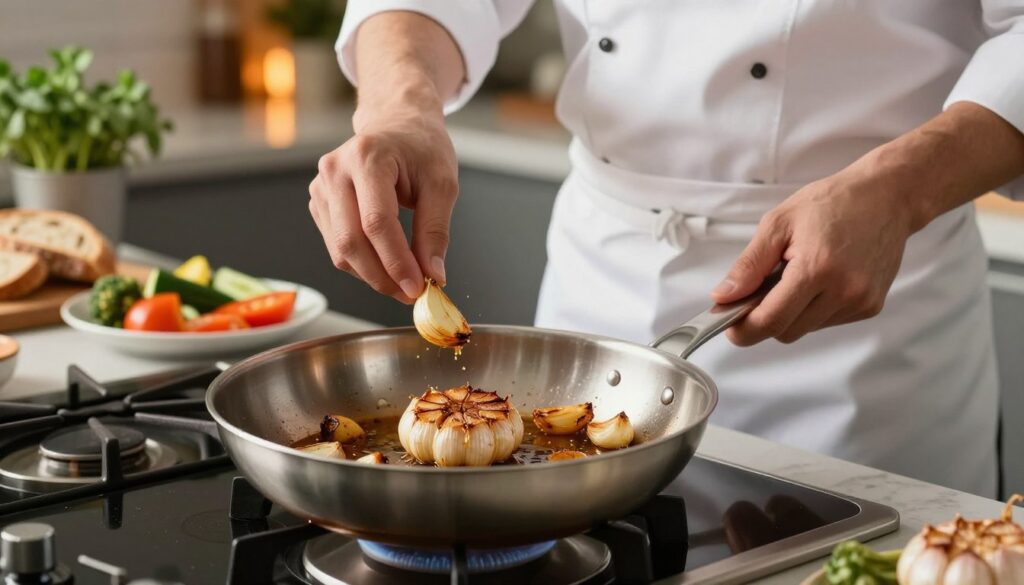
I always start by sautéing onions or other aromatics first. They need a good three to five minutes to soften and become translucent. This step creates a buffer against the intense heat of the pan.
Only then do I add the minced garlic. It should go in during the final minute or two of the process. This brief window allows its essential oils to release and become fragrant without turning bitter.
Garlic is the soul of many dishes, but it demands respect for its power and fragility.
If you add it too early, those oils dissipate and burn. This can ruin the entire base of your dish before other ingredients even finish. Proper timing protects its sweet, savory profile.
By waiting, you ensure every bite carries that perfect, aromatic flavor. It’s a simple adjustment that elevates your entire cooking experience.
Overcrowding the Pan: Achieving That Perfect Sear
The Maillard reaction, that magical chemical process responsible for browning, requires one non-negotiable condition: space. Your hot pan must stay between 330°F and 350°F to trigger it. Adding too much food at once drops the temperature instantly.
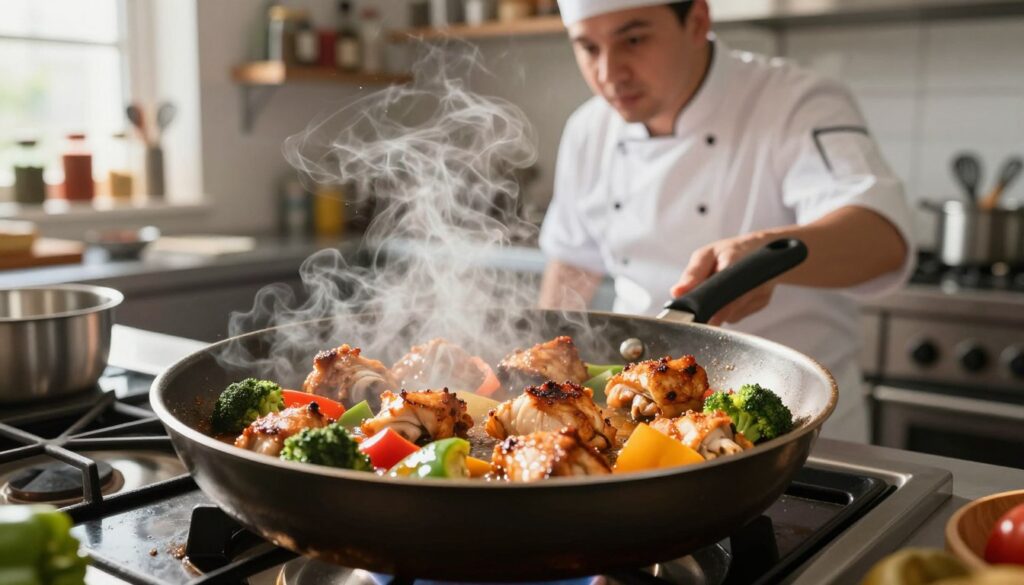
This plunge below the critical range stops proper browning. Instead, trapped moisture creates steam. Your ingredients boil in their own juices rather than developing a golden crust.
I learned to cook in batches for consistent results. It ensures the pan recovers its heat for every piece. This patience is part of the cooking process.
A crowded pan is why meat or vegetables turn out soggy. They lack that crispy, flavorful sear we all love. Giving each item room is a fundamental skill for any home chef.
Mastering this simple rule transforms your results. You move from steamed and pale to perfectly browned and delicious. It’s the difference between a good meal and a great one.
Tasting as You Cook: Adjusting Flavors on the Fly
The most transformative habit I adopted was learning to taste my food before it was finished. This simple act lets you guide a meal to its best possible version. You become the chef, not just a follower of steps.
I once made a marinara sauce that was far too sharp. A few teaspoons of sugar softened the acidic edge perfectly. It taught me that balance is dynamic, not fixed.
Never wait until the end to check seasoning. Early adjustments allow flavors to meld and deepen as they simmer. Your dish evolves harmoniously.
Developing your palate takes practice. Start by noticing how salt brightens or how acid lifts a heavy sauce. Soon, you’ll predict how a soup’s profile will change with more heat.
If something feels missing, don’t hesitate. Try a pinch of salt, a squeeze of lemon, or a dash of sweetness. Small tweaks can transform the entire flavor profile.
Proper Knife Maintenance: Drying and Storage Essentials
The longevity of your kitchen equipment hinges on a few simple post-wash rituals. I learned this after noticing spots on my favorite chef’s knife.
Preventing Corrosion in Cast Iron, Stainless Steel, and Knives
Water left on metal starts a chemical reaction with oxygen. This leads to rust, which can pit and damage surfaces. Your blade and pans need immediate attention.
I always dry my cast iron thoroughly to protect its seasoning. A quick towel pass for stainless steel prevents water spots. For a sharp knife, it takes just five seconds.
Tool
Drying Action
Storage Tip
Reason
Chef’s Knife
Dry immediately with a towel
Store in a block or on a magnetic strip
Prevents blade corrosion and keeps edge sharp
Cast Iron Pan
Heat on stove to evaporate all moisture
Keep in a dry place, lightly oiled
Protects the seasoned non-stick surface from rust
Stainless Steel Pan
Wipe dry to avoid water spots
Stack with cloth between pans
Avoids surface discoloration and maintains shine
These steps extend the life of your tools. They stay in top condition for years of reliable use.
Using Non-Stick Cookware Correctly to Prolong Its Life
I once ruined a brand new non-stick pan by using the wrong utensil. A metal spatula left deep scratches in the coating during my first use. That experience taught me a valuable lesson about tool selection.
You should never use metal utensils on this cookware. They can scratch the surface and introduce harmful particles into your food. Always reach for a wooden spoon or a plastic spatula instead.
When you’re using non-stick cookware, remember to choose gentle utensils. These tools protect the delicate coating from unnecessary damage. I have found that avoiding metal is the most effective way to keep my pans performing well.
Non-stick pans are not designed to last forever. Treating them with care will significantly extend their lifespan in your home kitchen.
Utensil TypeMaterialSafe for Non-Stick?Reason
Wooden SpoonHardwoodYesSoft surface won’t scratch
Silicone SpatulaFood-grade siliconeYesFlexible and gentle
Metal TurnerStainless steelNoCan gouge the coating
Nylon TongsHeat-resistant nylonYesSmooth edges are safe
If you notice the coating starting to flake, it is time to replace your pans. This ensures your food remains safe to eat. Proper care makes a big difference.
Additional Cooking Hiccups: Reading Recipes and Prepping Ingredients
A simple oversight in reading a recipe once left me scrambling for a missing ingredient mid-way through preparing dinner. This experience taught me that many kitchen frustrations stem from two simple oversights. Not reading instructions fully and poor ingredient preparation can derail your entire effort.
Taking a few minutes before you start makes all the difference. It transforms a hectic session into a smooth, enjoyable activity.
The Importance of Reading the Recipe Thoroughly
I always read through my recipes twice before I begin. The first pass gives me a general idea. The second check ensures I understand each step and have everything I need.
This habit prevents timing errors and missing items. Many dishes require specific equipment or marinating time. Discovering this halfway through is a major source of stress.
Proper Ingredient Preparation for Success
Complete your prep before turning on any heat. Chop all vegetables and measure your spices. Organize them in small bowls on your counter.
This method, called mise en place, is a game-changer. It keeps your workflow organized and your mind focused. You are ready to cook without frantic pauses.
Pre-Cooking Step
Specific Action
Key Benefit
Read the Recipe
Review entire instructions twice
Identifies missing items & timing
Gather Equipment
Place all tools on counter
Prevents mid-process searches
Prep Ingredients
Chop, measure, and organize
Ensures a smooth workflow
Check Special Notes
Look for marinate or rest times
Avoids last-minute surprises
An organized workspace makes your cooking experience much more enjoyable. It significantly reduces stress and leads to better results. This foundational process sets you up for success every time.
When to Flip Your Meat: Avoiding Tough, Overcooked Results
The sizzle of meat hitting a hot pan is a promise of flavor, but only if you resist the urge to move it. I used to flip my steaks constantly, fearing they would burn. This habit always led to a tough, dry final product.
Learning to wait transformed my results. A good sear locks in juices and creates a delicious crust.
Understanding the Art of a Good Sear
Proper browning requires uninterrupted contact with intense heat. This process, called the Maillard reaction, creates complex flavors. If you move the meat too soon, you stop this reaction.
Patience is the most important factor. Let the meat cook undisturbed until it releases naturally from the pan. This indicates the crust has fully formed.
If your meat is sticking, it needs more time. Flipping too early tears the surface and ruins the sear. Wait for that natural release for the best outcome.
Cut of Meat
Approx. Thickness
First-Side Cook Time
Key Sign to Flip
Beef Steak
1 inch
4-5 minutes
Releases easily from pan
Chicken Breast
3/4 inch
6-7 minutes
Edges turn opaque
Pork Chop
1 inch
5-6 minutes
Golden brown crust forms
Ground Beef Patty
1/2 inch
3-4 minutes
Juices rise to top surface
Following these guidelines ensures a juicy, flavorful result every time. Trust the process and let the heat work its magic.
Cooking Pasta Right: Avoiding a Crowded Pot and Gummy Results
Achieving perfectly al dente pasta hinges on one often-overlooked factor: space. I learned this after serving a sticky, clumped-together meal. The problem wasn’t the brand of pasta or the sauce.
It was how I managed the boiling water. Giving each strand room to move is a game-changer for texture.
Choosing the Ideal Pot and Water Ratio
Always use a large pot with plenty of water. A small pot causes the water to become overly starchy. This creates a gummy and sticky final dish.
Ample water ensures the pasta cooks evenly. It also prevents the strands from sticking together as they soften. This simple step guarantees a much better result.
Adding salt to the boiling water is a crucial step. It seasons the pasta from the inside out. Your sauce will cling to a more flavorful base.
Stir during the first few minutes of the cooking process. This is the best way to prevent clumping. Proper water management transforms your pasta every single time.
Every Mistake is a Lesson: Embracing My Culinary Journey
Every time I misjudged a step, I gained insight that slowly transformed my approach to meals. This journey taught me that errors are not failures but essential teachers.
Learning from Each Kitchen Mistake
I viewed each kitchen error as a way to refine my technique. Even a burnt sauce taught me about heat control. This mindset turns frustration into progress.
Many home cooks feel discouraged by a single blunder. The most successful ones learn from every experience. It’s how you become a better cook.
Improving My Skills with Patience and Practice
The cooking process is an art that requires gentleness with yourself. Mastering a sharp knife or perfect cooking time takes repetition. Patience is your greatest tool.
I practiced until my movements felt natural. Consistent effort builds confidence over weeks and months. Growth happens one lesson at a time.
Type of Blunder
Immediate Result
Lesson Learned
Overcooking Protein
Dry, tough meat
Use a thermometer and trust resting time
Underseasoning
Bland dish
Taste frequently and adjust in layers
Rushed Knife Work
Uneven cuts, risk of injury
Focus on technique, not speed
Ignoring Recipe Notes
Missing ingredients or steps
Read thoroughly before starting
Embrace each stumble as a step forward. Your culinary path is unique and built on these moments.
Conclusion
The true joy of preparing food comes not from perfection, but from the lessons learned along the way. Mastering this art means paying close attention to details. Watch the amount of salt you use and the quality of your fresh vegetables.
If your dish becomes too salty, add a chunk of potato or a bit of olive oil to balance it. For example, if your vegetables release too much liquid, sauté them separately first. This protects the texture of your final meal.
Every stumble in the kitchen is a valuable part of your cooking process. I hope these insights help you create wonderful food with more confidence. Keep practicing, taste as you go, and enjoy the journey.
FAQ
Why is an instant-read thermometer so important for meat?
I used to guess when my chicken or steak was done, which often led to overcooking. A thermometer gives me the exact internal temperature, ensuring perfect doneness every single time. It takes the stress out of preparing proteins.
How long should I let my steak rest after cooking?
For a juicy result, I let most cuts sit for about 5 to 10 minutes. A larger roast might need 15 to 20 minutes. This pause allows the juices to redistribute throughout the meat instead of running out onto the plate.
How can I stop my butter from burning in the pan?
Butter burns because of its milk solids. I watch it carefully, cooking over medium heat until it foams and smells nutty. For higher heat, I switch to clarified butter or a high-smoke-point oil like avocado oil.
What’s the one thing I can do to improve my knife skills?
Keep your blade sharp! A dull knife is dangerous and crushes food. I use a honing steel regularly and get my knives professionally sharpened once or twice a year. A sharp blade makes prep work faster and safer.
When should I add garlic to a sauté?
I add minced garlic towards the end, usually in the last minute or two of cooking. If it goes in too early with the onions, it can scorch and turn bitter, ruining the flavor of my entire dish.
What happens if I overcrowd my skillet?
The pan temperature drops, and food steams instead of sears. I give each piece plenty of space so it can brown properly. If I’m making a large batch, I cook in batches for the best texture.
Should I really taste my food while I’m making it?
Absolutely! Tasting as I go is my best tool for adjusting flavors. I check for seasoning balance partway through the process, not just at the end. This habit has made me a much more confident home chef.
What’s the best way to care for my kitchen knives?
I always hand-wash and dry them immediately after use to prevent rust and handle damage. I store them in a knife block or on a magnetic strip, never loose in a drawer where the edges can get nicked.
How do I make my non-stick pans last longer?
I avoid using metal utensils and high heat, which can scratch and degrade the coating. I use silicone or wooden tools and reserve these pans for delicate tasks like eggs or fish. I never put them in a very hot oven.
Why is reading a recipe all the way through so crucial?
I learned this the hard way! Reading first helps me understand the steps, gather all my ingredients (this is called *mise en place*), and spot any special equipment or techniques needed before I start. It prevents mid-recipe surprises.
How do I know when it’s time to flip a piece of meat?
I wait until it releases easily from the pan. If it sticks, it isn’t ready. A proper sear forms a crust that naturally detaches. For burgers or steaks, I usually don’t move them for a good 3-4 minutes on the first side.
What’s the secret to cooking pasta perfectly?
I use a large pot with plenty of salted water—at least 4 quarts for a pound of pasta. This gives the noodles room to move and cook evenly, preventing them from sticking together and becoming gummy. It makes a huge difference.
