You try to flip the chicken, and half of it stays behind — cemented to the pan. The rest tears, the sear is wrecked, and you’re standing at the stove wondering what you’re doing wrong. If this keeps happening to you, you’re not a bad cook. You’re just missing a few specific pieces of information that most recipes never explain.
The question of why does chicken stick to the pan has a real, scientific answer. And once you understand the mechanism behind it, the four fixes below will stop feeling like arbitrary rules and start feeling like obvious solutions you can actually trust.
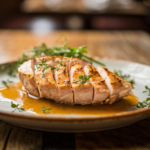
Here’s what’s actually going on — and how to fix it tonight.

The Real Reason Chicken Sticks (It’s Science, Not Bad Luck)
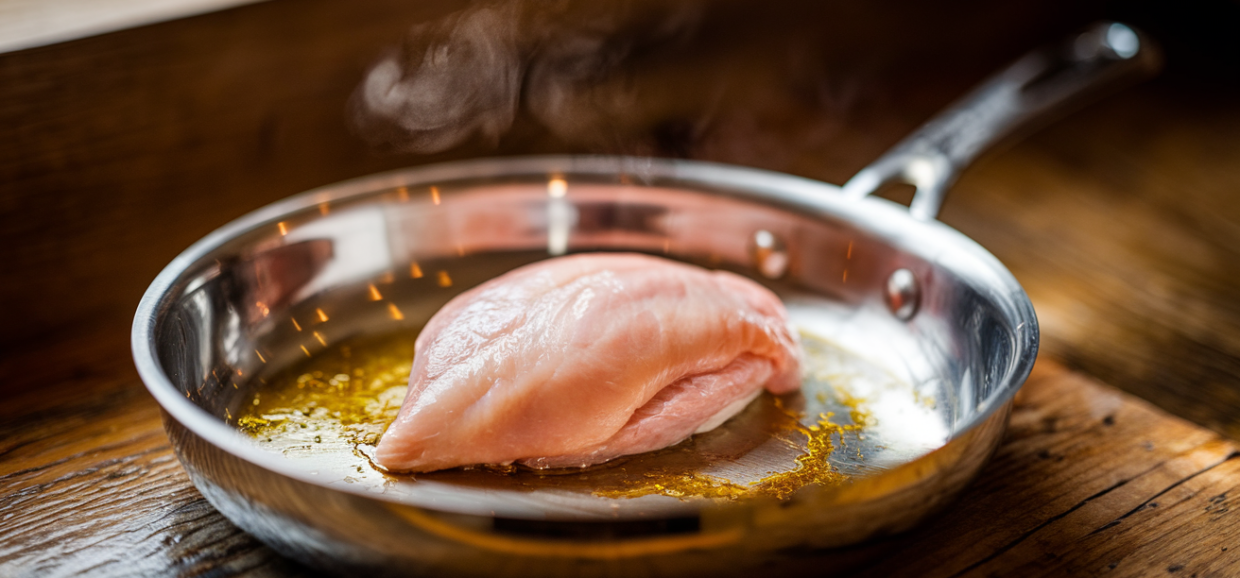
When raw chicken makes contact with a metal surface, the proteins in the meat — primarily myosin and actin — form physical bonds with the metal at a molecular level. This happens with any lean protein: fish, pork, shrimp. It is not unique to chicken, and it is not random.
Here is the part that changes everything: those bonds break on their own once the sear is complete. As the crust develops, the browned surface creates a new layer between the meat and the pan, and the chicken releases cleanly. If you feel resistance when you try to lift it, the sear is not finished yet. The chicken is still bonded to the metal and needs another 60 seconds — not more force.
This is why sticking is almost always a process problem rather than an equipment problem. The same pan that tears your chicken apart today will produce a perfect golden crust the moment you change how you use it. Fix the process, and the sticking stops.
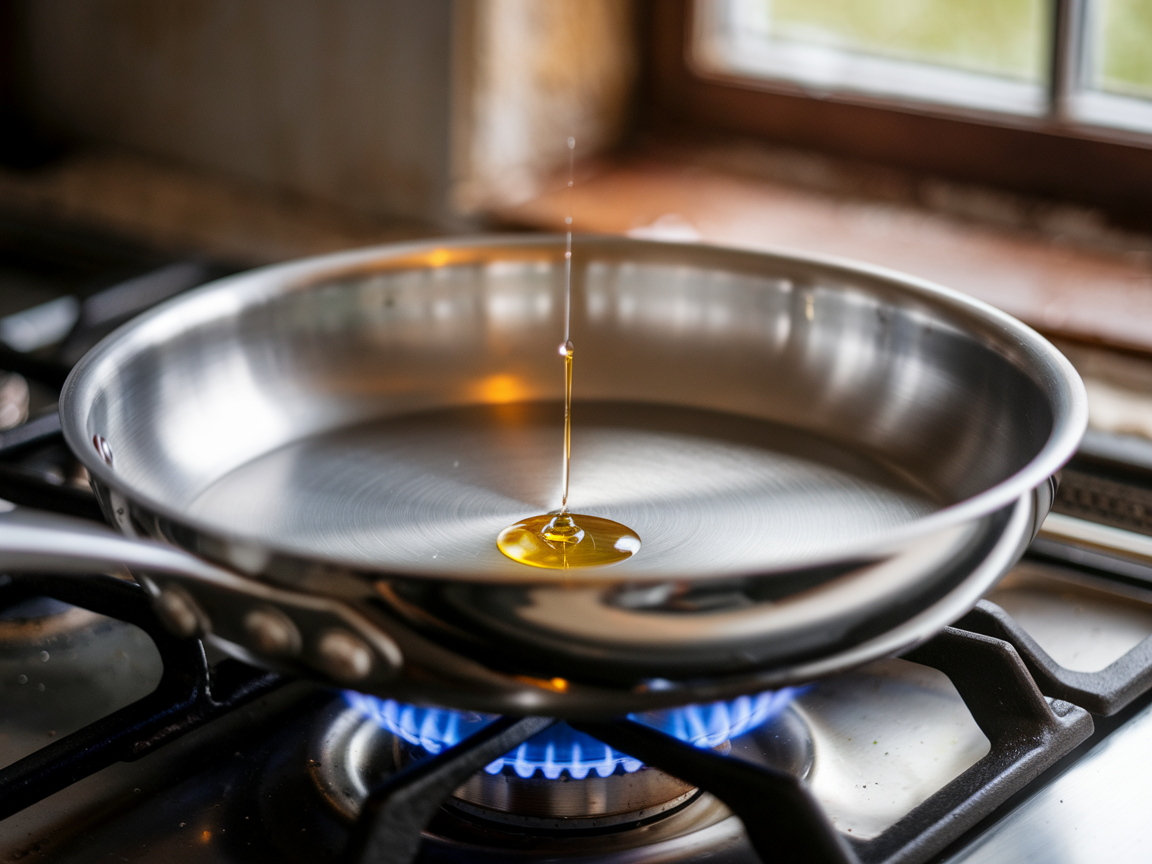
Fix 1: Preheat Your Pan — Then Add the Oil
The sequence matters more than most cooks realize: pan first, oil second, chicken third. A common habit is to add oil to a cold pan, heat both together, and then add the chicken. That order is the problem.
Heat your dry pan over medium-high for about 2 minutes. You can test it with a few drops of water — when they bead up and skitter across the surface, the pan is ready. Add your oil and let it heat until it shimmers, which takes around 30 seconds. Then add the chicken.
A properly preheated pan creates a thin vapor layer between the hot metal and the cold oil that prevents raw protein from making direct contact at that first critical moment. The chicken hits a hot, lubricated surface and sears immediately rather than bonding to cold steel. That single change eliminates most sticking by itself.
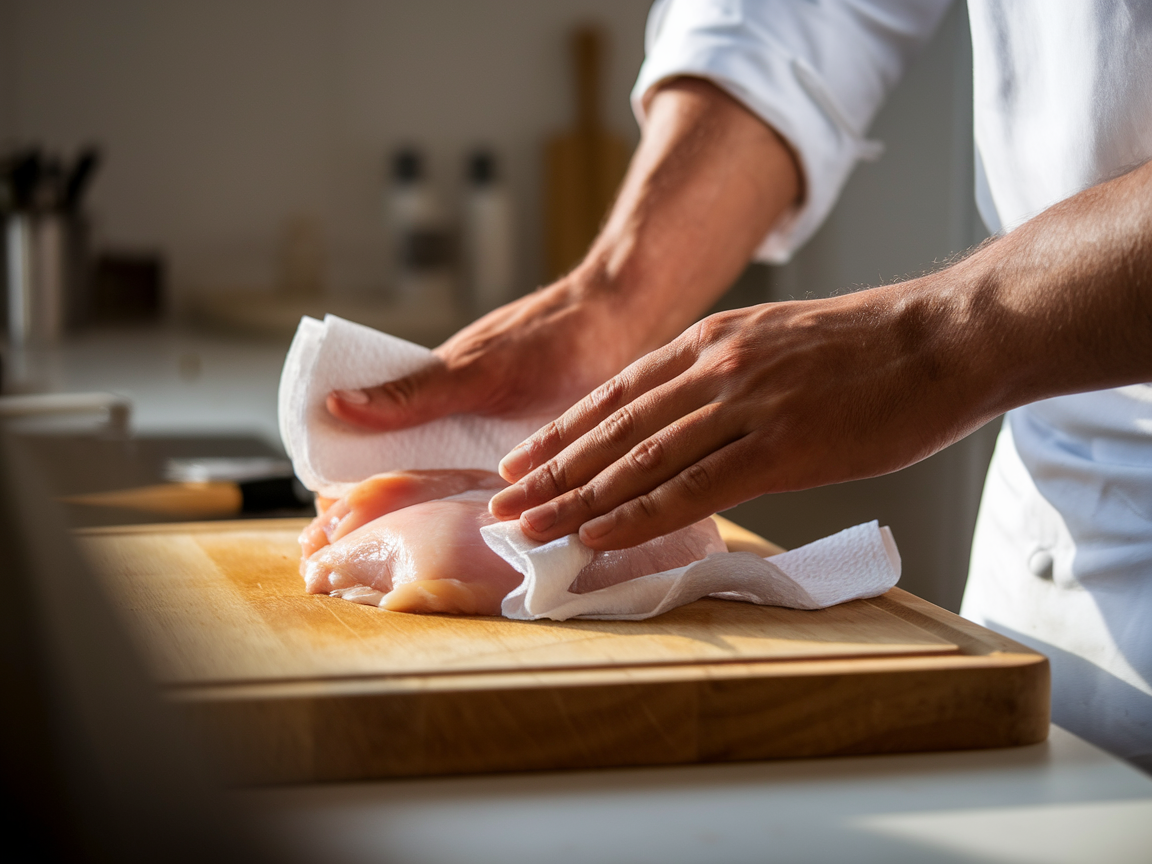
Fix 2: Pat Your Chicken Completely Dry
Surface moisture is the second major culprit. If your chicken goes into the pan wet — straight from the package or after sitting in a marinade — that water hits the hot oil and instantly becomes steam. Steam creates a vapor barrier between the meat and the pan, which blocks the sear. No sear means the proteins stay bonded to the metal instead of forming their own protective crust.
Pat every surface of the chicken thoroughly with paper towels before it goes near the pan. If it was marinated, shake off the excess and dry it anyway. The drier the surface, the better the sear. For even better results, season the chicken with salt 30 to 60 minutes ahead, leave it uncovered in the fridge, and pat it dry one more time right before cooking — the surface will be noticeably drier by then.
This is also why marinated chicken sticks more than plain chicken. The wet coating vaporizes on contact, delays the sear, and keeps the protein stuck to the metal longer. A 10-second pat-dry solves it completely.
Fix 3: Don’t Skip the Fat — And Don’t Let It Burn
Fat is the physical barrier between protein and metal. You need a thin, even film of oil coating the entire pan surface before the chicken goes in — not a pool, but enough to coat. Swirl or tilt the pan after adding oil so it covers edge to edge.
Oil choice matters at high heat. Butter burns at around 300°F to 350°F, which is cooler than the temperature you want for searing chicken. Use avocado oil, vegetable oil, or canola oil — these hold up to 400°F and above without degrading. Extra virgin olive oil sits somewhere in between; it will work on medium heat but can burn at the high heat needed for a proper sear.
If your oil starts smoking heavily before the chicken is in — or smells acrid and sharp rather than toasty — it has burned. Wipe out the pan, lower the heat slightly, and start the oil again. Burned oil leaves a sticky, bitter residue on the pan surface that causes sticking no matter what you do afterward.
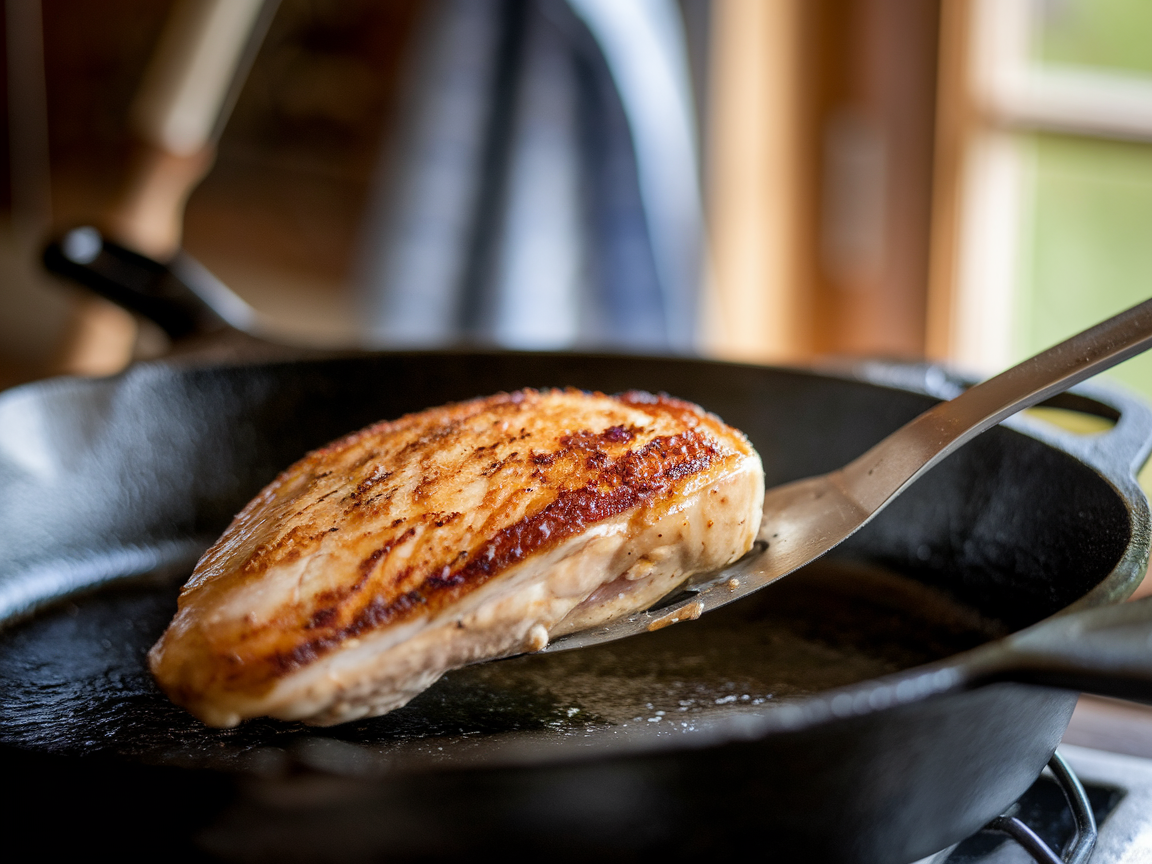
Fix 4: Leave It Alone and Wait for the Release
This is the fix that requires the most discipline: do nothing. Once the chicken is in the pan, press it gently for full contact with the surface, then leave it completely untouched for 4 to 6 minutes. No nudging, no checking underneath, no moving it around to find a hotter spot.
When the sear is ready, the chicken will tell you. Try to lift one edge gently with a spatula — if it releases cleanly with almost no resistance, it is ready to flip. If you feel it holding on at all, give it 60 more seconds and try again. Forcing a flip before the crust has formed is the single most common cause of torn, stuck chicken. The protein is still actively bonded to the metal, and pulling it free tears the meat rather than releasing it.
A 6-ounce boneless chicken breast seared at medium-high typically needs 5 to 6 minutes before the natural release. A thicker breast — 8 ounces or more — may need 7 minutes. Let the chicken set the pace.
Does Pan Type Matter?
Pan type changes how much margin for error you have — it doesn’t change whether sticking is possible. All four fixes above apply to any pan, but the consequences of skipping one step vary by material.
Stainless steel is the most demanding. It has no coating to cushion mistakes, so heat management and surface dryness become non-negotiable. The Leidenfrost water-bead test is especially useful here. When it’s working correctly, stainless steel delivers an exceptional sear — better than most pans. But the technique has to be right.
Cast iron holds heat so well that cold chicken straight from the fridge can drop the surface temperature and trigger sticking before the pan recovers. Pull your chicken from the refrigerator at least 15 minutes before cooking, and preheat the cast iron for 3 to 4 full minutes rather than the standard 2. A seasoned cast iron that’s properly heated barely sticks at all.
Nonstick pans give you the most forgiveness — but they’re not immune. Cold chicken on a cold nonstick pan will still steam and stick. Nonstick doesn’t cancel out the need for heat and dryness. It just raises the floor on how bad things can get when you skip a step.
Frequently Asked Questions
Why does my chicken stick even with a nonstick pan?
Nonstick reduces sticking but doesn’t eliminate it. A wet piece of chicken added to an unpreheated nonstick pan will still steam rather than sear, and steam creates the same bonding conditions as any other pan. Work through the four fixes above — they apply equally to nonstick surfaces.
Should I let chicken come to room temperature before cooking?
For 15 to 20 minutes on the counter, yes — especially with thicker cuts or cast iron, which are most sensitive to temperature drops. Cold chicken straight from the fridge lowers the pan surface temperature the moment it makes contact, which slows the sear and extends the bonding window. Pull it out ahead of time and pat it dry right before it goes in.
What oil is best for cooking chicken without sticking?
Avocado oil is the best all-around option, with a smoke point above 500°F. Refined vegetable oil and canola oil both work well above 400°F. Avoid extra virgin olive oil and butter for high-heat searing — they burn before the sear can fully develop, leaving a sticky, bitter residue.
Why does marinated chicken stick more than plain chicken?
The marinade adds surface moisture that vaporizes on contact with the hot pan, delaying the direct contact needed for a proper sear. Sugars in most marinades also burn faster than dry chicken at high heat. Pat marinated chicken completely dry before it goes in — you’ll keep all the internal flavor while getting a genuine sear.
How do I know when to flip the chicken?
Try to lift one edge gently with a thin spatula. If there’s any resistance, the sear isn’t done. If it lifts cleanly with a golden-brown crust underneath, it’s ready to flip. A properly seared piece of chicken releases itself — you don’t need to pry it loose. If you’re prying, you’re early.
The Checklist: Before You Cook Your Next Chicken Breast
Screenshot this or run through it mentally before your next cook. Seven steps, five minutes of prep, and sticking becomes a thing of the past:
- Pull the chicken from the fridge 15 to 20 minutes ahead
- Pat every surface completely dry with paper towels
- Heat the dry pan over medium-high for 2 full minutes
- Add a high smoke point oil and heat until it shimmers (about 30 seconds)
- Season the chicken just before it goes in the pan
- Press gently for full surface contact, then leave it completely alone
- Test for the natural release before flipping — never force it
Once these steps become habit, you’ll stop thinking about sticking altogether and start focusing on what comes next: getting the most out of your ingredients. Browse our chicken recipes to put these techniques into practice tonight, or explore the full library of cooking tips to keep building kitchen confidence one skill at a time.
