-
Prep Time10 Minutes
-
Cook Time15 Minutes
-
Serving4
-
Serving Size1 Bowl
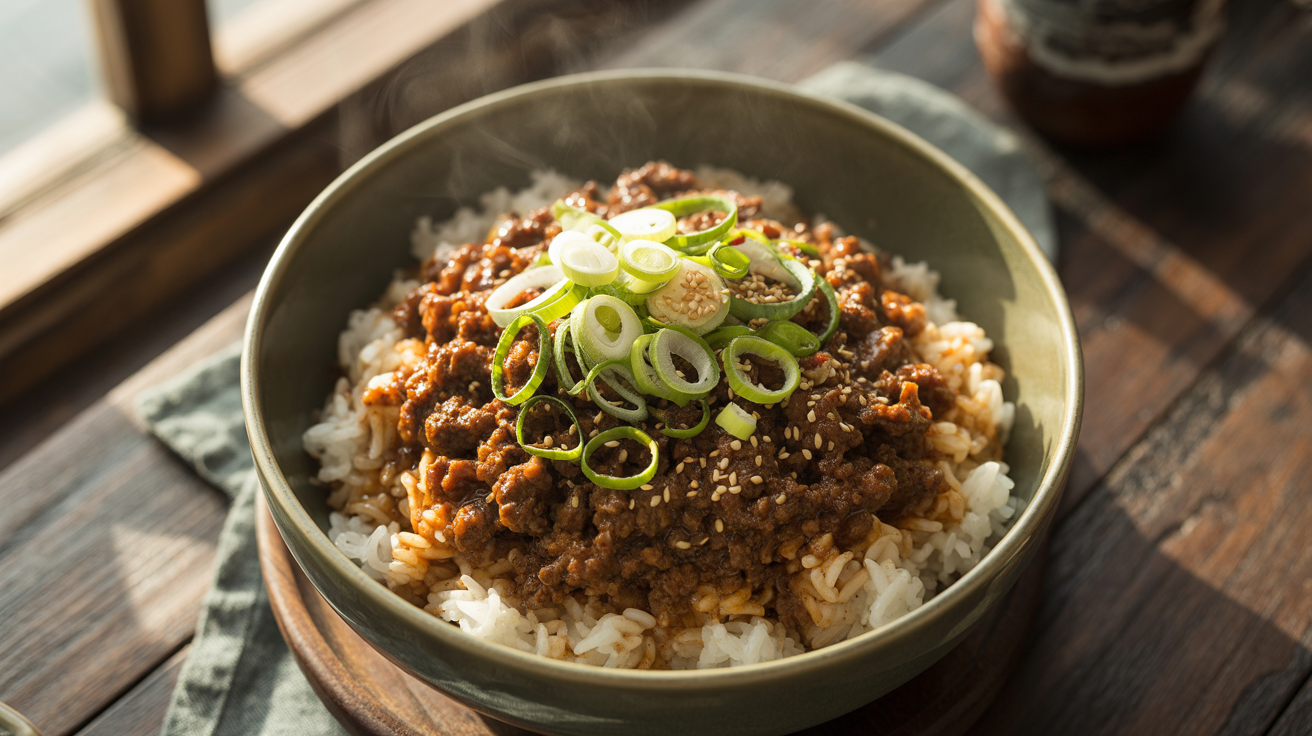
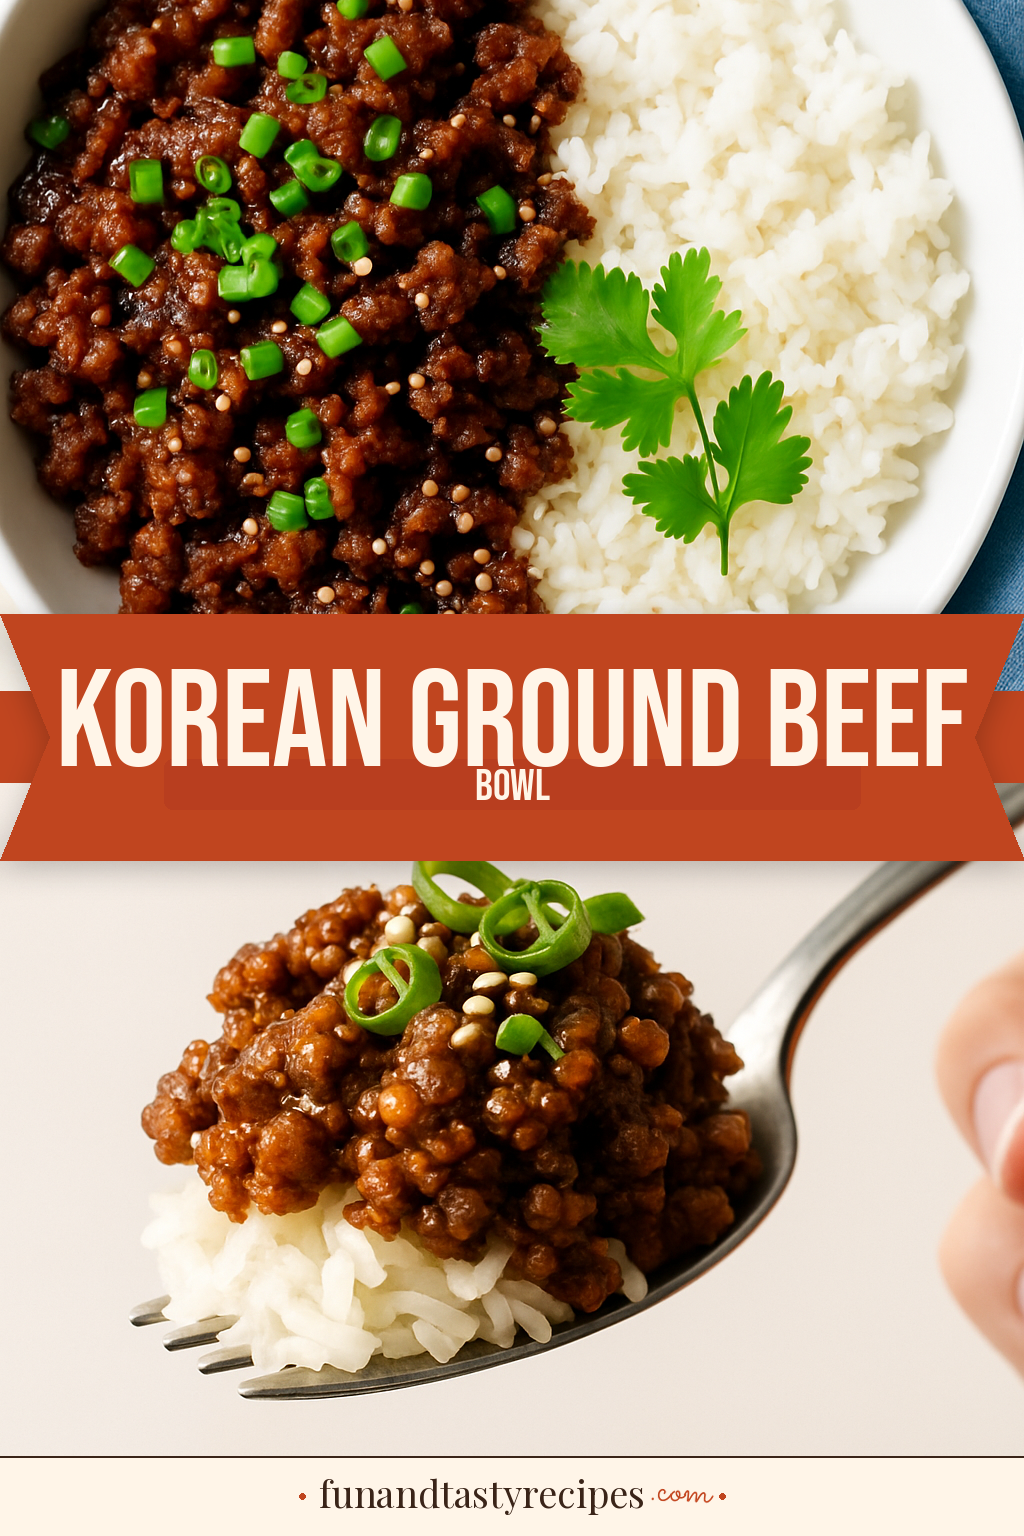
You know that craving for Korean BBQ takeout that hits on a Tuesday night when you absolutely do not have time to go anywhere? This Korean ground beef bowl is the answer. Savory, sweet, garlicky ground beef with a soy-sesame glaze, piled high over fluffy steamed rice — it’s everything you love about bulgogi in a fraction of the time and cost.
The magic is in the sauce: soy sauce, brown sugar, sesame oil, garlic, and ginger combine into something that’s somehow both deeply complex and surprisingly simple to throw together. The ground beef soaks it all up while caramelizing just slightly at the edges, giving you that glossy, sticky coating in every single bite. One pan, 20 minutes, and you’re done.
This is the recipe you’ll reach for when the fridge looks bare and everyone needs to eat now. It reheats beautifully for meal prep, it’s genuinely budget-friendly, and the whole family will be asking for it again. Top it with a fried egg, sliced cucumbers, and a drizzle of sriracha, and suddenly a regular Tuesday night feels like a restaurant night.
Helpful Products
Enter your email and we’ll send it straight to your inbox!
Love this recipe? Save it to Pinterest!
Did you make this recipe?
Leave a rating and let us know how it turned out! Your feedback helps other home cooks.
Ingredients
Korean Ground Beef Bowl
Nutrition
Per serving
- Daily Value*
-
Calories: 485 kcal
-
Protein: 27g54%
-
Carbohydrates: 48g17%
-
Fat: 18g23%
-
Fiber: 1g4%
-
Sugar: 8g9%
-
Sodium: 780mg34%
Directions
This recipe moves quickly once the beef hits the pan, so have your sauce mixed and everything prepped before you start. The most important step is getting a good brown on the beef — don't rush it and don't stir too much. That caramelization is where all the flavor lives.
Step 1: Mix the Sauce
In a small bowl, whisk together the soy sauce, brown sugar, sesame oil, rice vinegar, and red pepper flakes until the sugar is fully dissolved. Set it aside — this is the flavor backbone of the whole dish, and having it ready before the beef hits the pan means everything moves smoothly from here.
Taste it now. It should be savory, slightly sweet, and have a gentle sesame aroma. If you want it saltier, add a splash more soy sauce. Sweeter, add another pinch of brown sugar.
Don't skip the rice vinegar — that small amount of acid balances the sweetness and keeps the sauce from tasting flat.
Step 2: Brown the Beef
Heat a large skillet or wok over medium-high heat. Add the ground beef and season with salt and pepper. Break it into small crumbles with a wooden spoon or spatula as it cooks.
Cook for 5 to 7 minutes, stirring occasionally but not constantly. You want the beef to develop some browned, caramelized edges — that's where the depth of flavor comes from. If you stir it every 10 seconds, it steams instead of browns.
Once the beef is fully cooked through with no pink remaining and the edges have some color, drain any excess fat if there's a lot pooling in the pan. Leave a small amount — it carries flavor.
Step 3: Add the Garlic and Ginger
Push the browned beef to the edges of the skillet to clear a space in the center. Add the minced garlic and grated ginger directly to that hot center, and let them cook for 30 to 60 seconds, stirring constantly. They should sizzle and turn fragrant — you'll smell it immediately.
Watch carefully here — garlic can go from golden to burnt in under 30 seconds on a hot pan. You want it fragrant and just barely starting to color, not dark brown.
Once the garlic and ginger are fragrant, stir them into the beef until everything is evenly mixed.
Step 4: Add the Sauce and Caramelize
Pour the sauce you mixed in Step 1 over the beef mixture. It will sizzle dramatically and start reducing immediately — this is exactly what you want. Stir everything together to coat every piece of beef.
Cook for 2 to 3 minutes, stirring occasionally, until the sauce reduces and clings to the meat in a glossy, caramelized coating. The liquid should nearly disappear — you'll see the beef go from wet and saucy to shiny and glazed.
When it looks glossy and lacquered rather than soupy, you're done. Remove the pan from the heat so it doesn't over-caramelize and turn bitter.
Step 5: Assemble the Bowls
Divide the cooked rice evenly between four bowls — about ¾ cup per bowl. Spoon a generous portion of the Korean beef over the rice, letting it settle into the sides.
Scatter sliced green onions and toasted sesame seeds over the top of each bowl. If you're using cucumber, fan a few slices alongside the beef for a fresh, cool contrast to the richness.
If you have a fried egg, now is its moment. Place it right on top of the beef, runny yolk-side up. When the yolk breaks over the beef and rice, it creates a rich, silky sauce that takes the whole bowl to another level.
Step 6: Finish and Serve
Give each bowl a drizzle of sriracha or your favorite hot sauce if you like heat. A few extra sesame seeds and a pinch more green onion on top makes it look beautiful and adds fresh bite.
Serve immediately while the beef is still warm and glossy. The rice at the bottom will absorb some of the glaze from the beef, which makes the last few bites at the bottom of the bowl genuinely the best ones.
For meal prep, store the beef and rice in separate containers in the fridge — the beef reheats perfectly in a skillet over medium-low heat with a tiny splash of water to loosen it up.
Leave a Review