-
Prep Time20 Minutes
-
Cook Time0 Minutes
-
Serving4
-
Serving Size1 Mason Jar
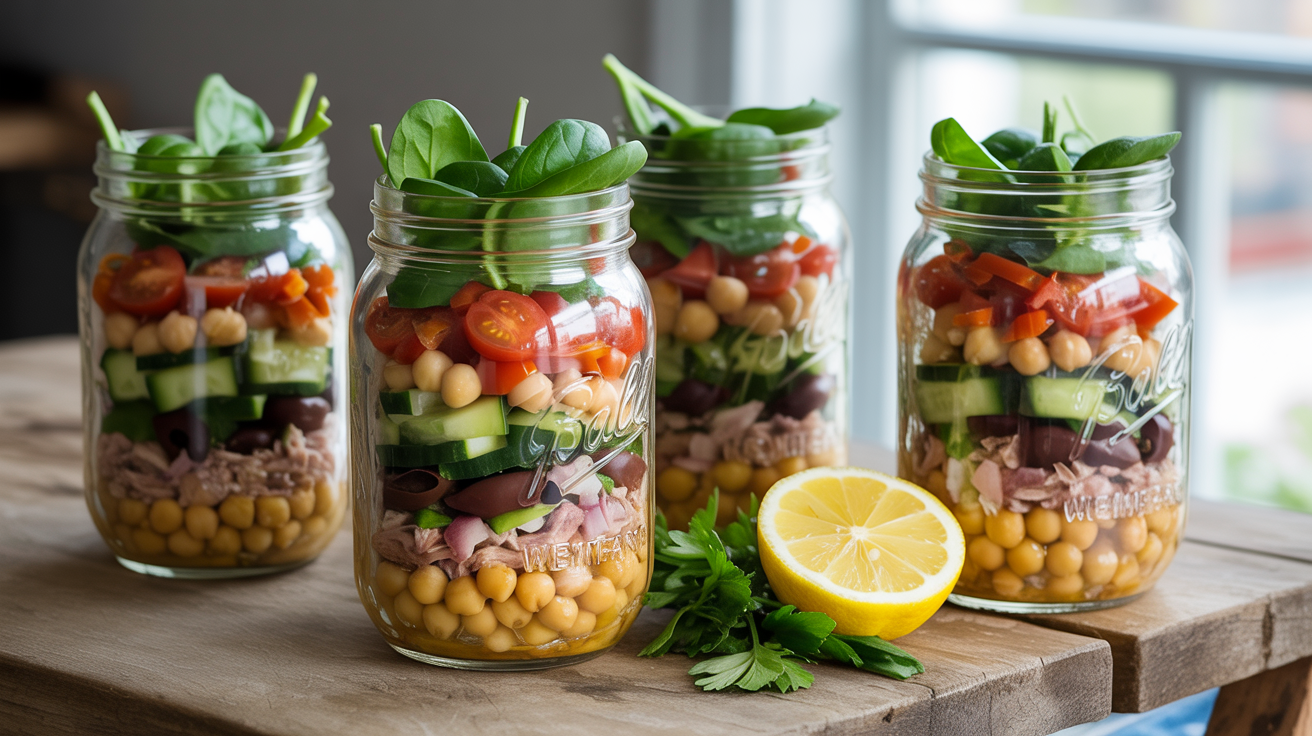
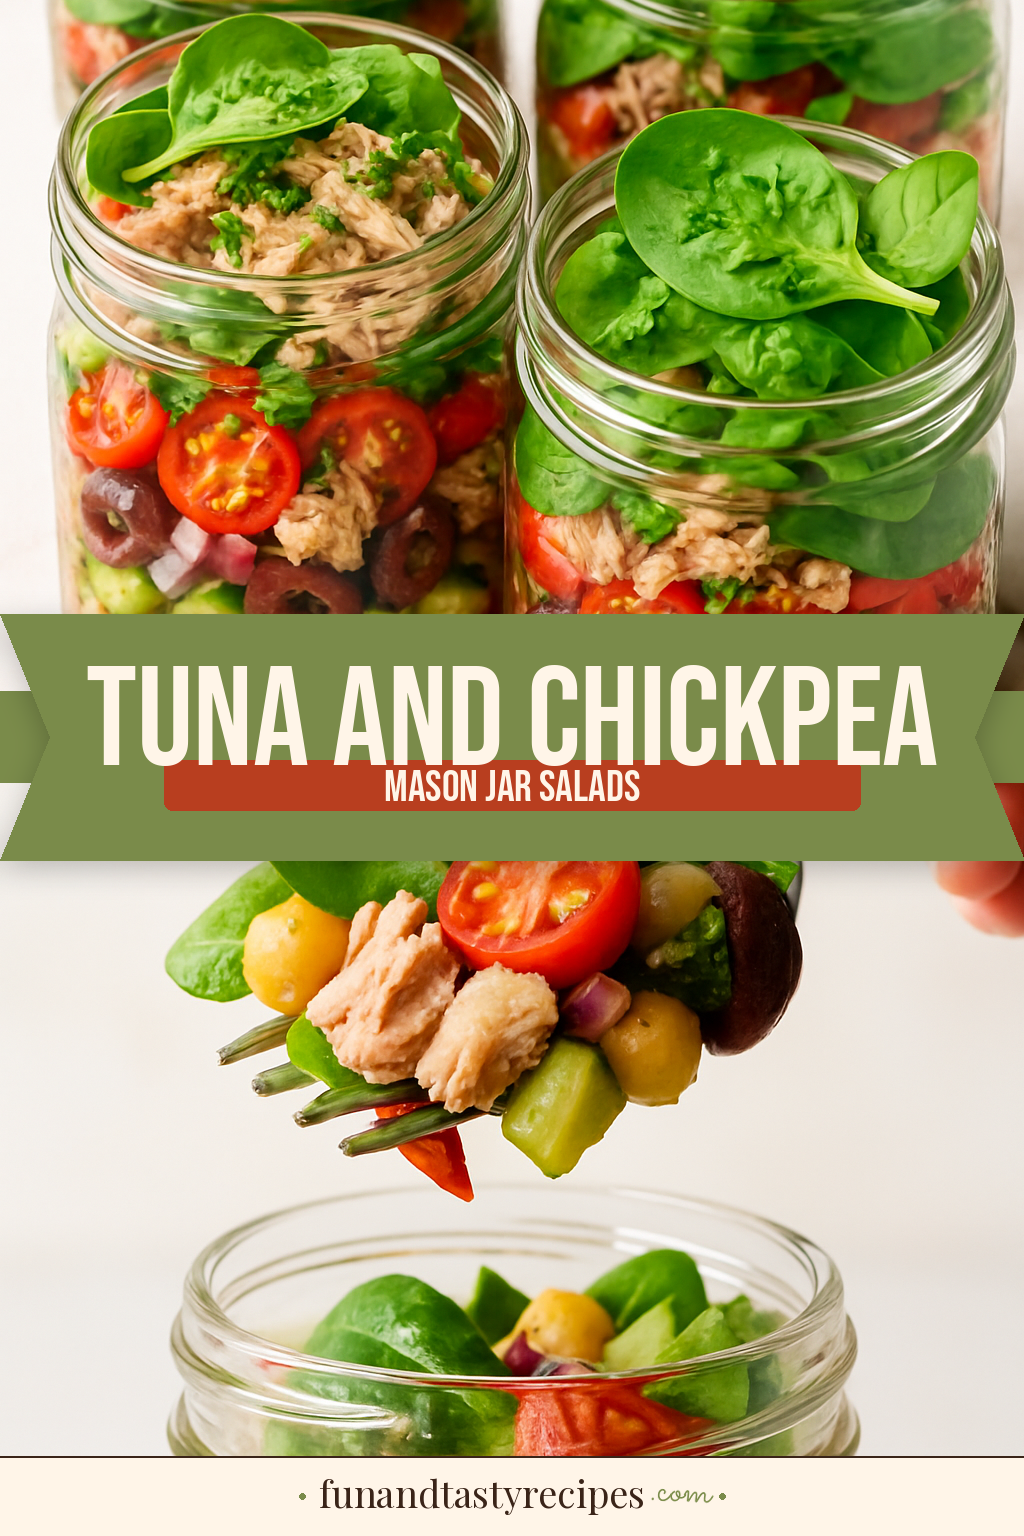
You know those lunch slumps where you open the fridge and just stare? That used to be me every single weekday — until I started making these Tuna and Chickpea Mason Jar Salads on Sunday afternoons. Five minutes of layering and I have four ready-to-grab lunches waiting for me. They’re protein-packed, genuinely filling, and they actually taste better after a day in the fridge because all those lemony, garlicky flavors have time to settle in.
What makes this combo work so well is the pairing of flaky tuna and hearty chickpeas. Together they give you a double hit of protein and fiber that keeps you full for hours — no 3 PM energy crash, no reaching for snacks twenty minutes after eating. Add crisp cucumber, sweet cherry tomatoes, briny olives, and a zippy lemon-herb dressing, and every bite has something interesting going on.
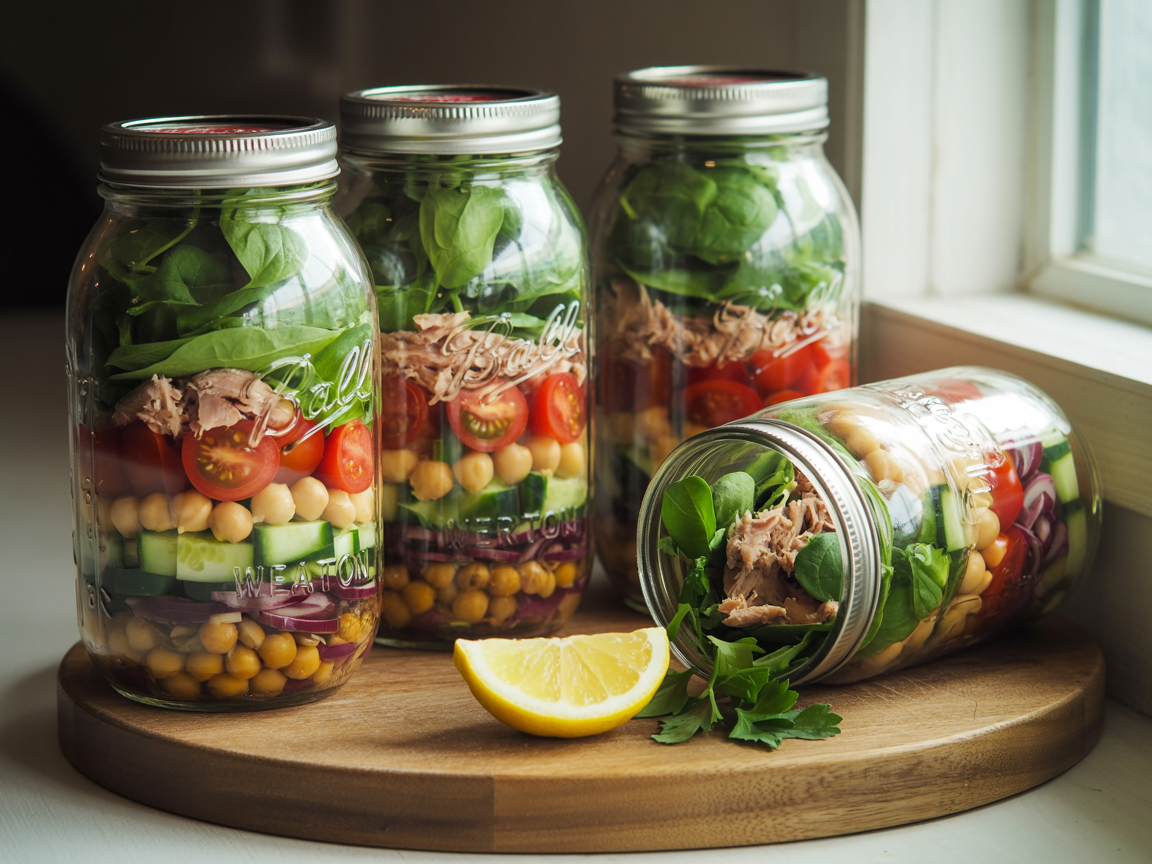
The mason jar method is the real genius here. By layering the dressing at the bottom and keeping the greens at the top, everything stays perfectly crisp until you’re ready to eat. Just flip the jar, shake it up, and pour it into a bowl (or eat straight from the jar if you’re feeling bold). It’s meal prep that actually works — no soggy salads, no sad desk lunches.
Helpful Products

Enter your email and we’ll send it straight to your inbox!
Love this recipe? Save it to Pinterest!
Did you make this recipe?
Leave a rating and let us know how it turned out! Your feedback helps other home cooks.
Ingredients
Tuna and Chickpea Mason Jar Salads
Nutrition
Per serving
- Daily Value*
-
Calories: 370 kcal
-
Protein: 28g56%
-
Carbohydrates: 26g9%
-
Fat: 17g22%
-
Fiber: 7g25%
-
Sugar: 5g6%
-
Sodium: 680mg30%
Directions
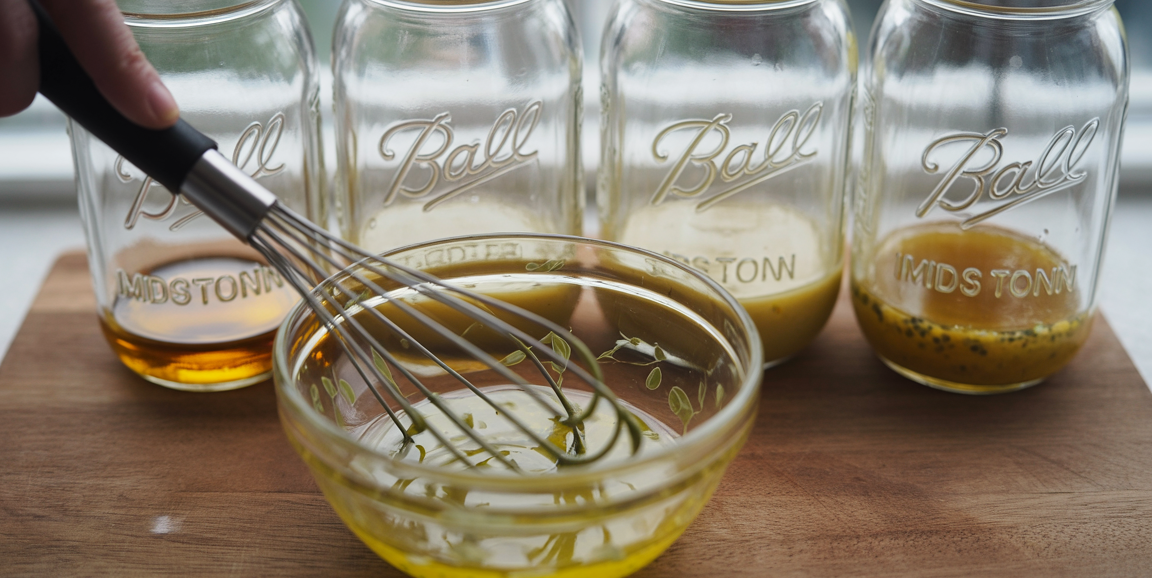
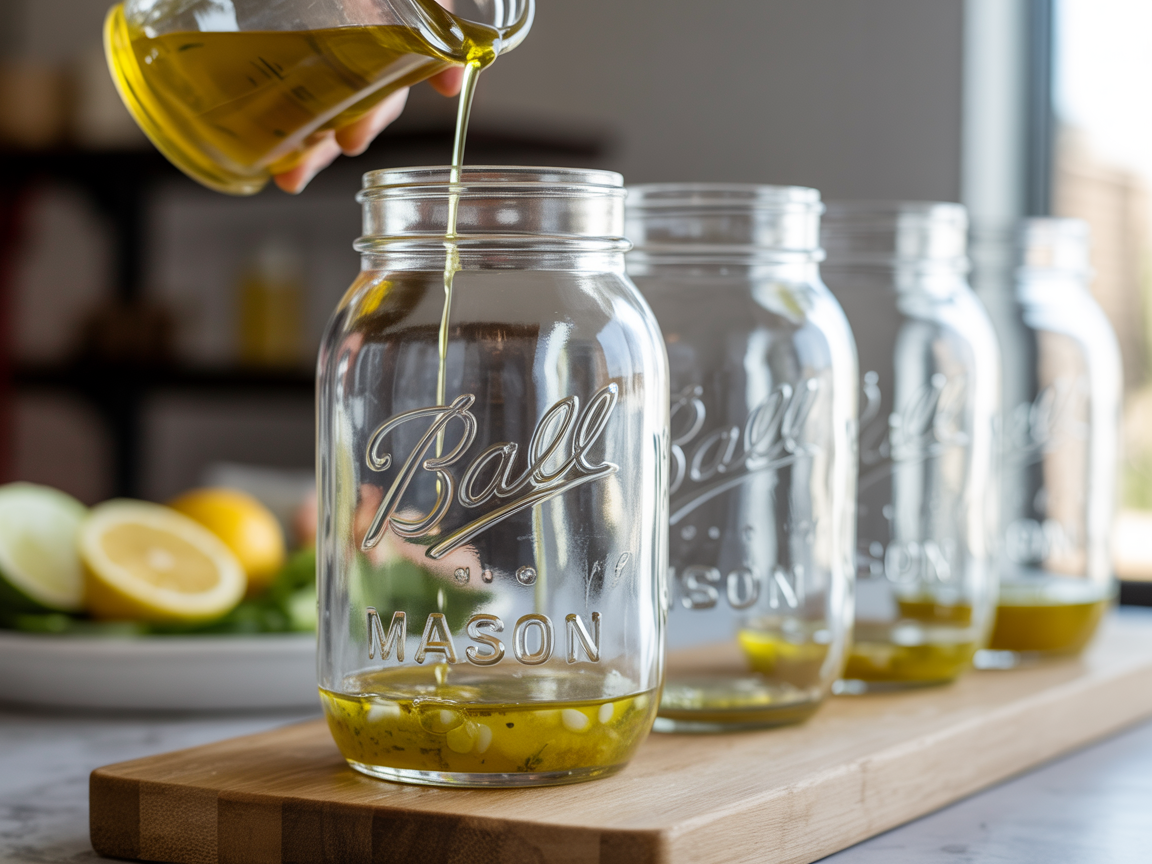
Step 1: Make the Lemon-Herb Dressing
In a small bowl or jar, combine the olive oil, fresh lemon juice, minced garlic, Dijon mustard, dried oregano, honey, salt, and black pepper.
Whisk everything together vigorously until the dressing is fully emulsified — it should look thick, glossy, and slightly creamy rather than separated.
Taste and adjust: if it needs more brightness, add a squeeze more lemon; if it's too sharp, add a tiny drizzle more honey. Set aside.
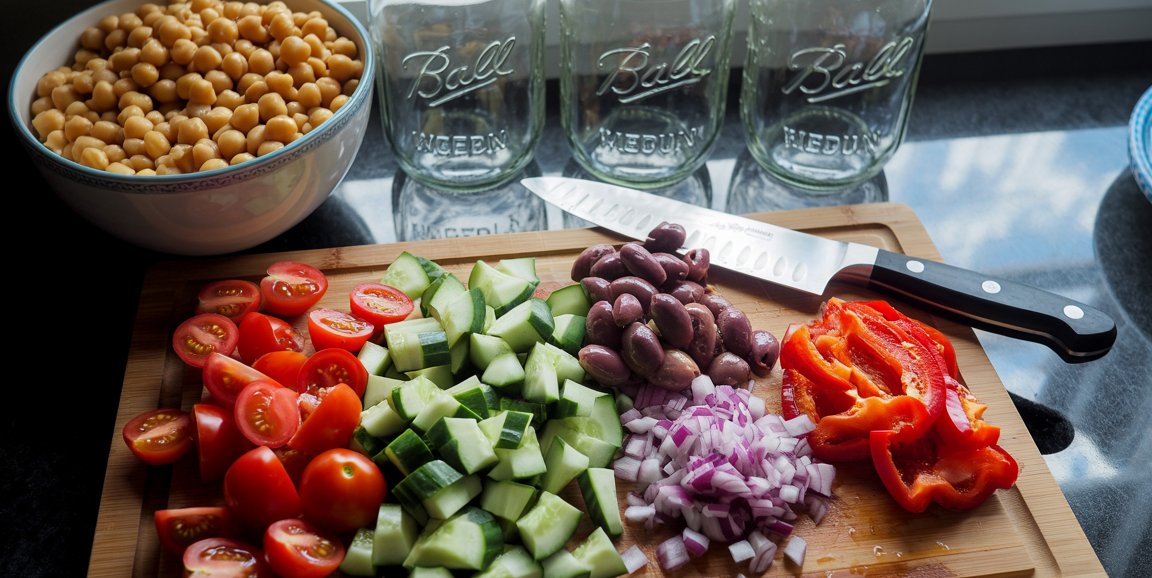
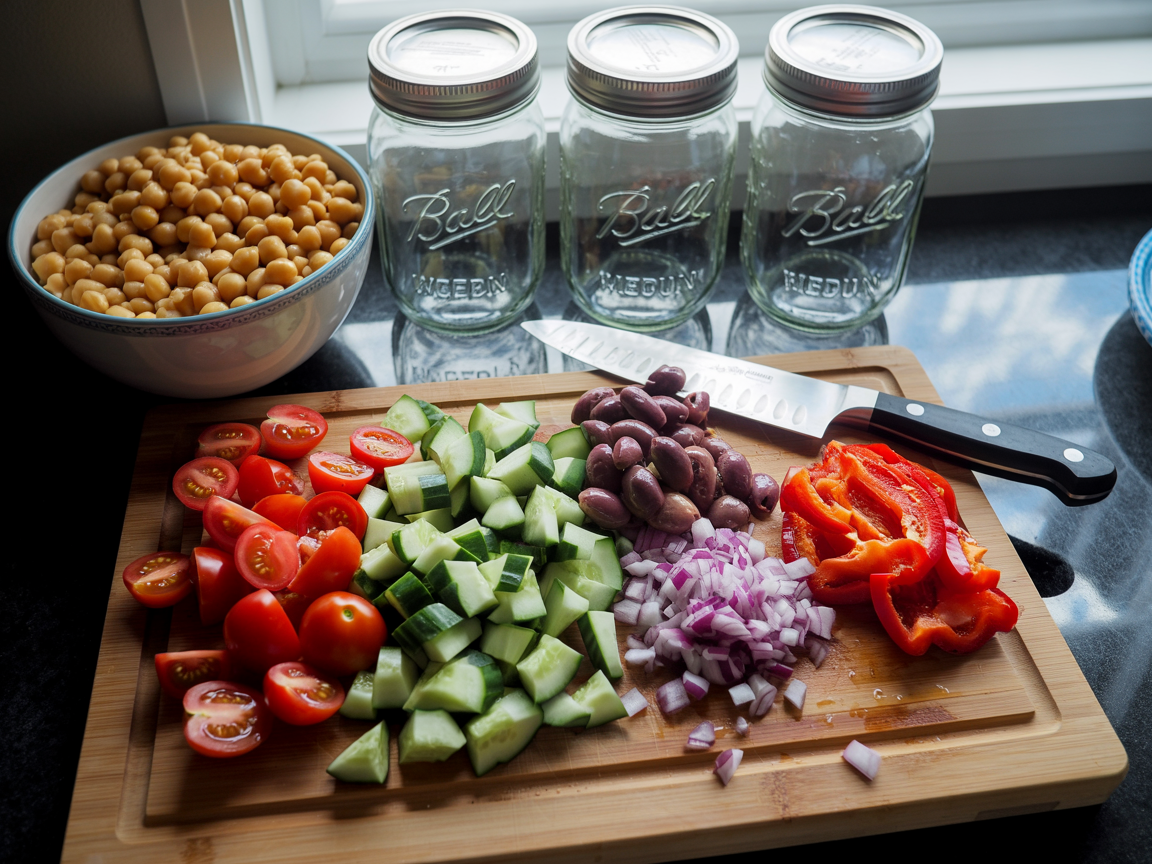
Step 2: Prep All Your Vegetables
Halve the cherry tomatoes, dice the cucumber into roughly 1/2-inch pieces, halve the Kalamata olives, finely dice the red onion, and slice the roasted red peppers into thin strips.
Give the rinsed chickpeas a pat dry with a paper towel — this helps them absorb the dressing better and keeps them from making the jar watery.
Chop the fresh parsley and have your baby spinach or mixed greens ready. Keeping everything prepped and organized makes assembly quick and stress-free.
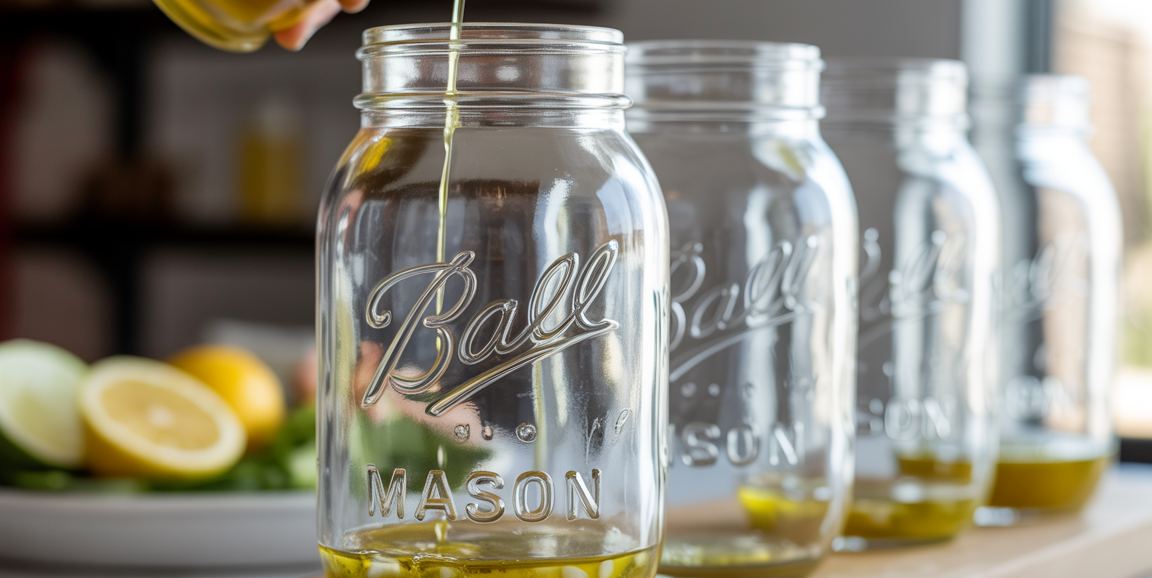
Step 3: Add the Dressing to the Bottom of Each Jar
Divide the lemon-herb dressing evenly between four wide-mouth quart-sized mason jars — about 2 tablespoons per jar.
Pour the dressing in first — this is the most important rule of mason jar salads. The dressing sits at the very bottom, away from the greens, so nothing wilts before you're ready to eat.
Tilt the jar slightly if needed to make sure the dressing coats the bottom evenly.
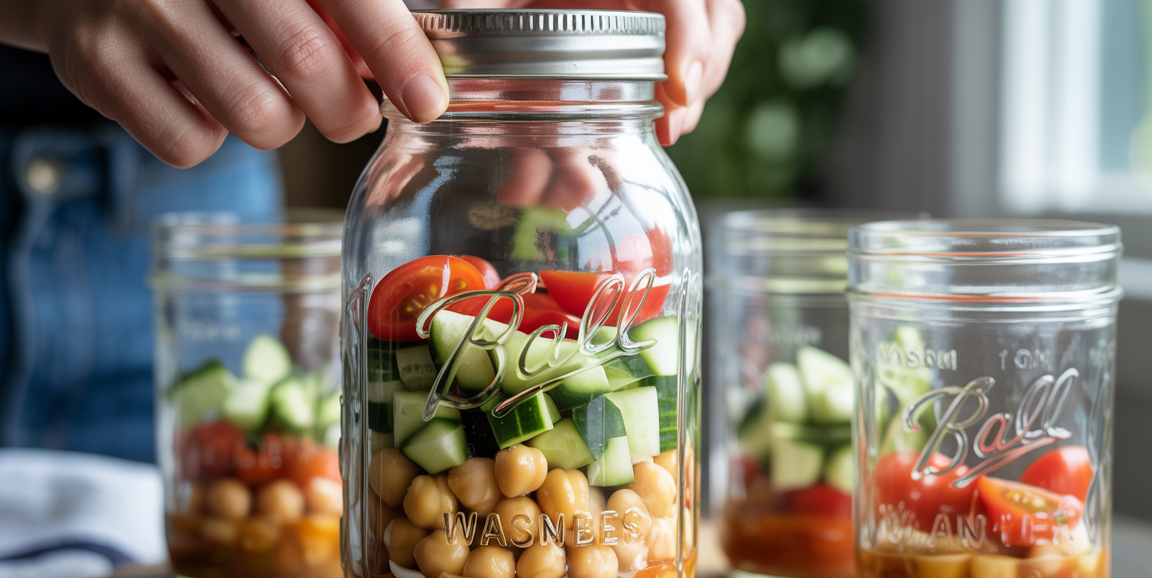
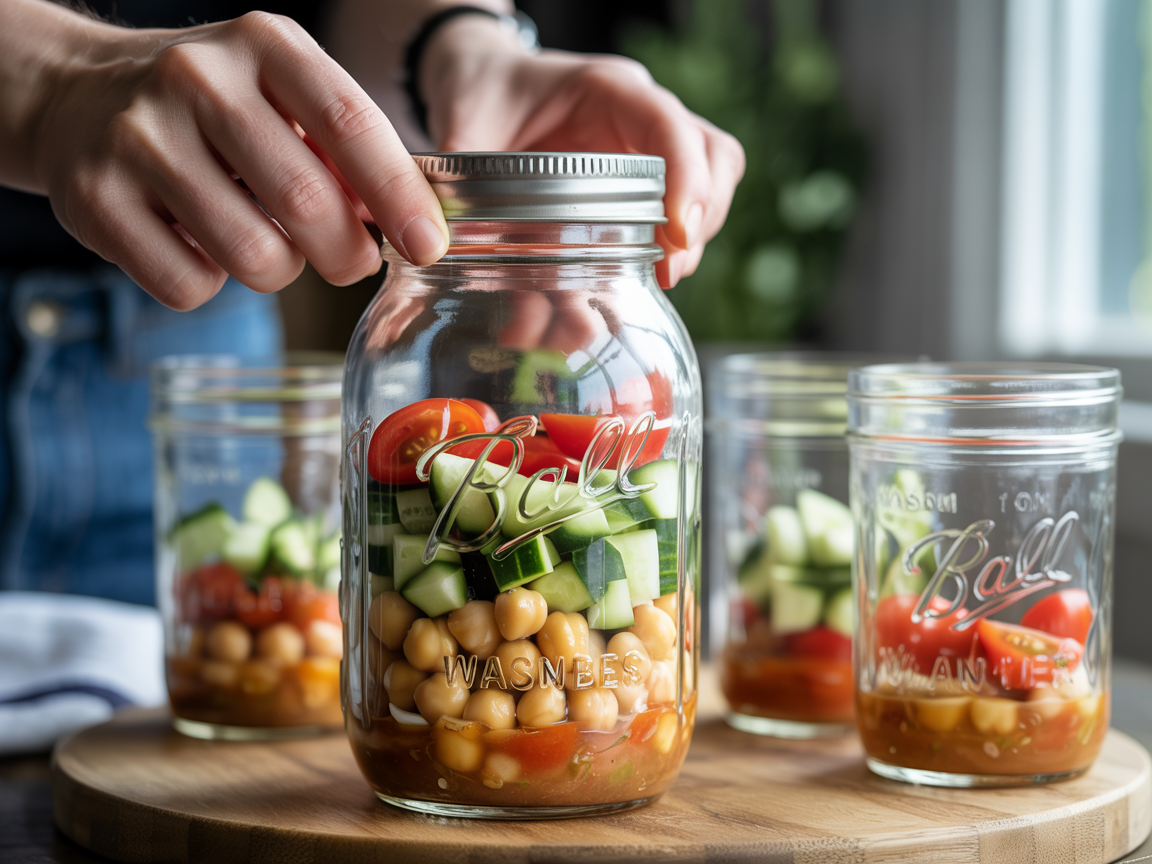
Step 4: Layer the Hearty Ingredients First
On top of the dressing, add the chickpeas — they are sturdy enough to sit right in the dressing without getting soggy, and they'll actually absorb all that lemony flavor overnight.
Next, add the cherry tomatoes and then the diced cucumber in an even layer.
These dense, water-resistant ingredients form a protective barrier between the dressing and the more delicate components that come next.
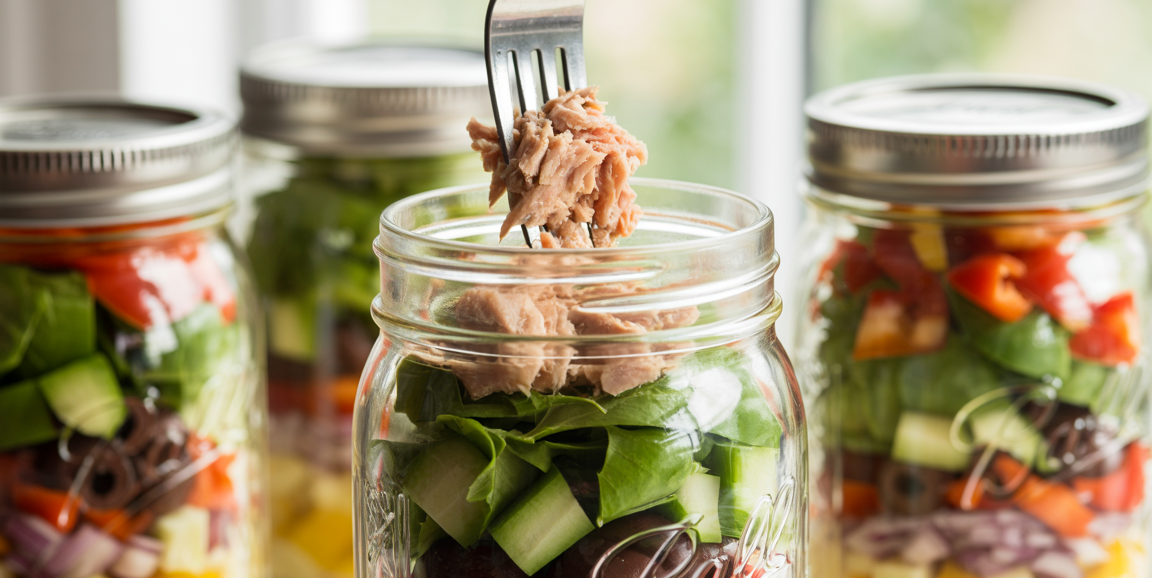
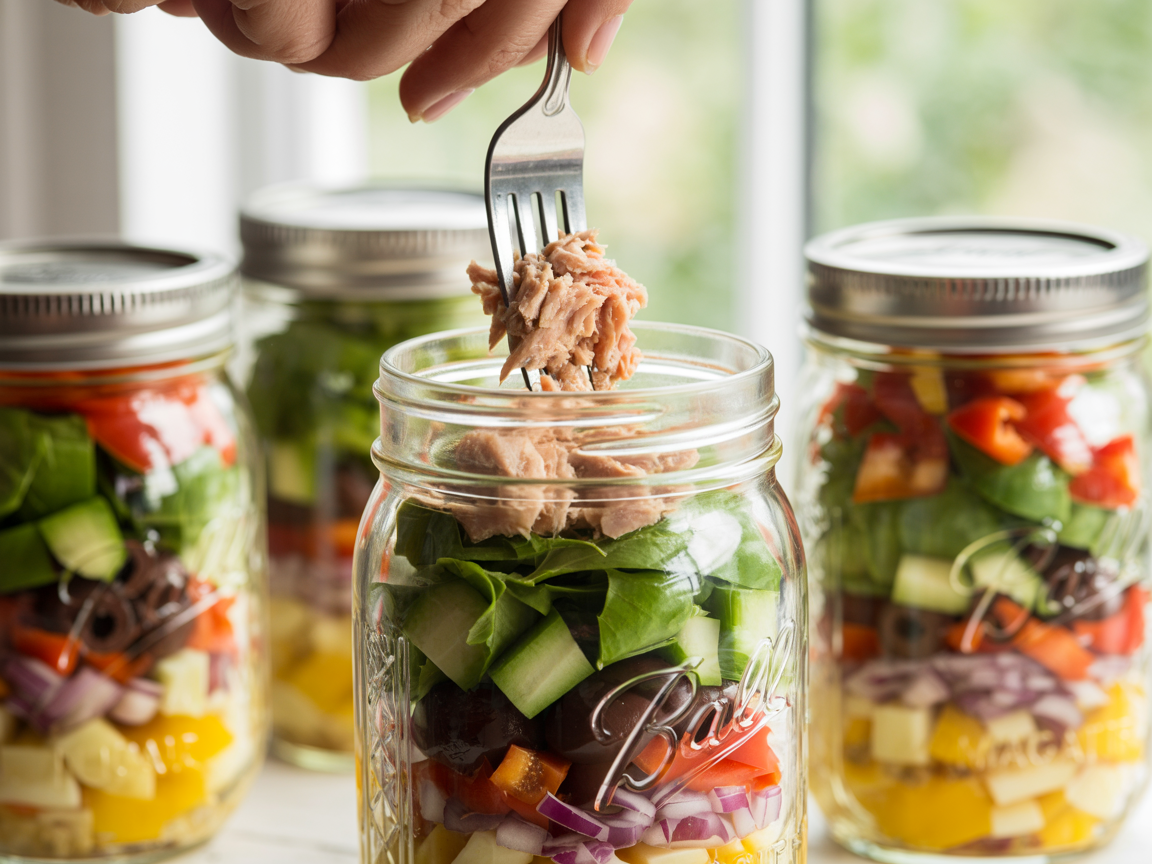
Step 5: Add the Tuna, Olives, and Peppers
Drain the canned tuna thoroughly and break it into large, chunky flakes with a fork — you want texture, not mush. Divide it evenly between the four jars.
Add the Kalamata olives, roasted red peppers, and finely diced red onion on top of the tuna layer.
This middle section is where all the big Mediterranean flavors live — briny, sweet, savory, and a little punchy from the onion.
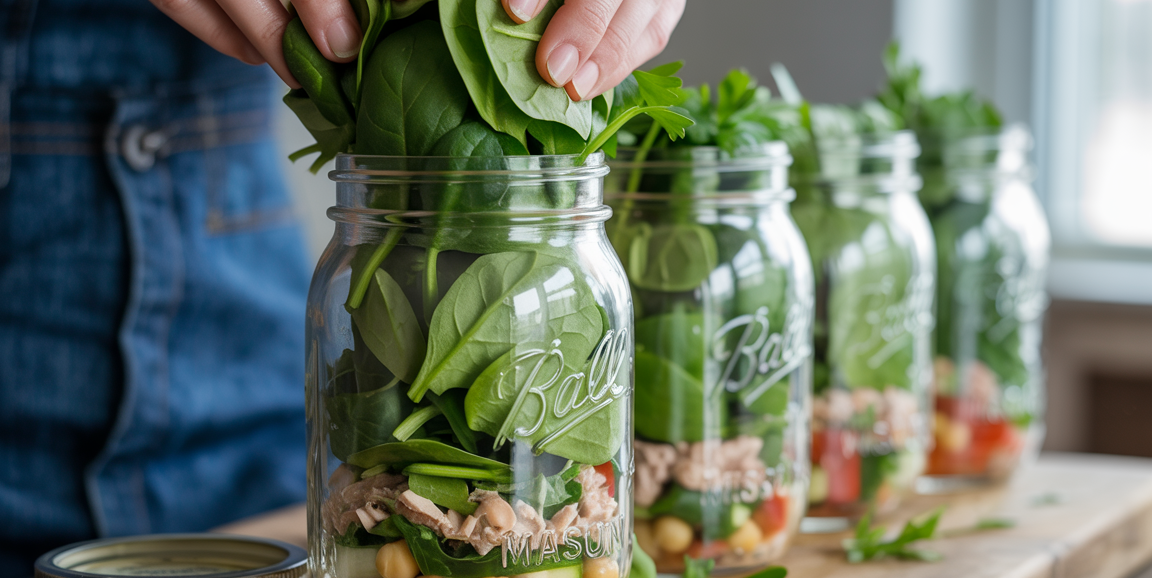
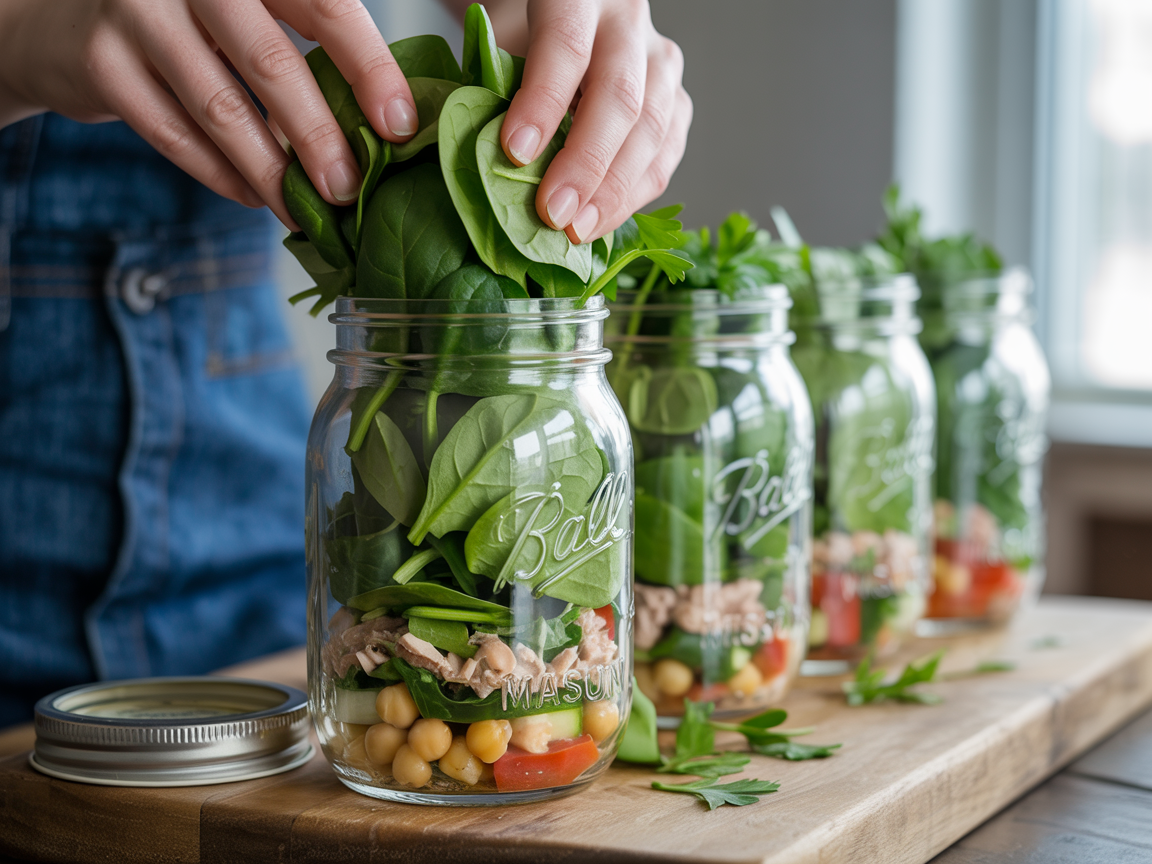
Step 6: Top with Greens and Parsley
Pack the baby spinach or mixed greens tightly on top — don't be shy, greens compress a lot and you want a full, satisfying salad when you shake it out.
Scatter the chopped fresh parsley over the greens as the final layer.
The greens must always be the very last thing you add. Their position at the top, furthest from the dressing, is exactly what keeps them crisp and fresh for up to four days in the fridge.
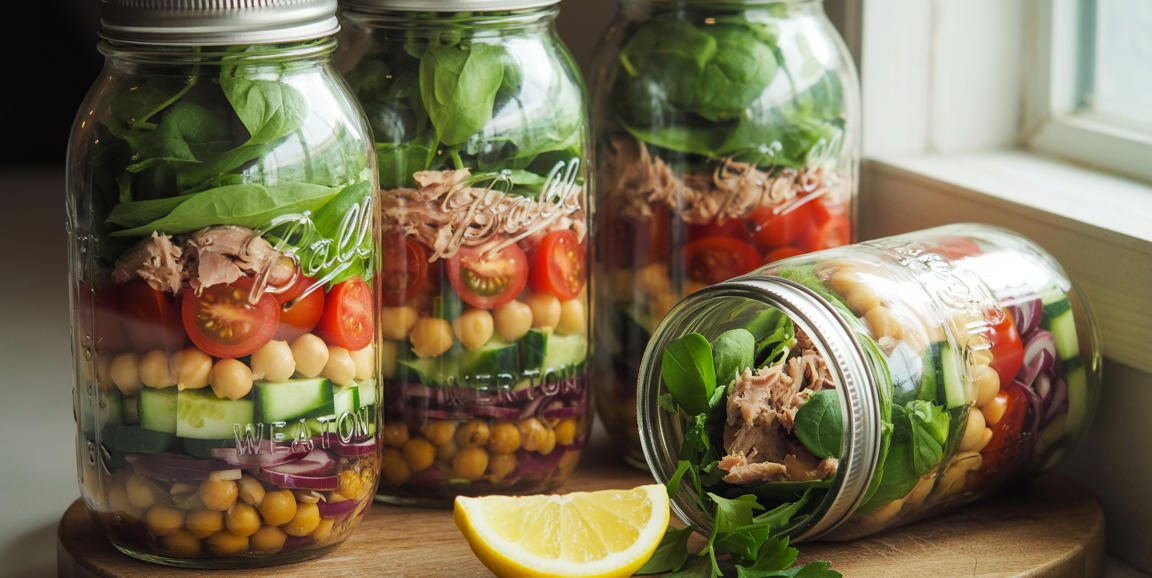
Step 7: Seal, Store, and Serve
Screw the lids on tightly and store the jars upright in the refrigerator for up to 4 days.
When you're ready to eat, shake the jar vigorously with the lid on to distribute the dressing, then either eat straight from the jar or pour into a wide bowl for easier tossing.
The salad will taste even better on day two and three as the chickpeas and tuna soak up all that garlic-lemon dressing — trust the process.

Leave a Review