-
Prep Time10 Minutes
-
Cook Time40 Minutes
-
Serving4
-
Serving Size2 Thighs
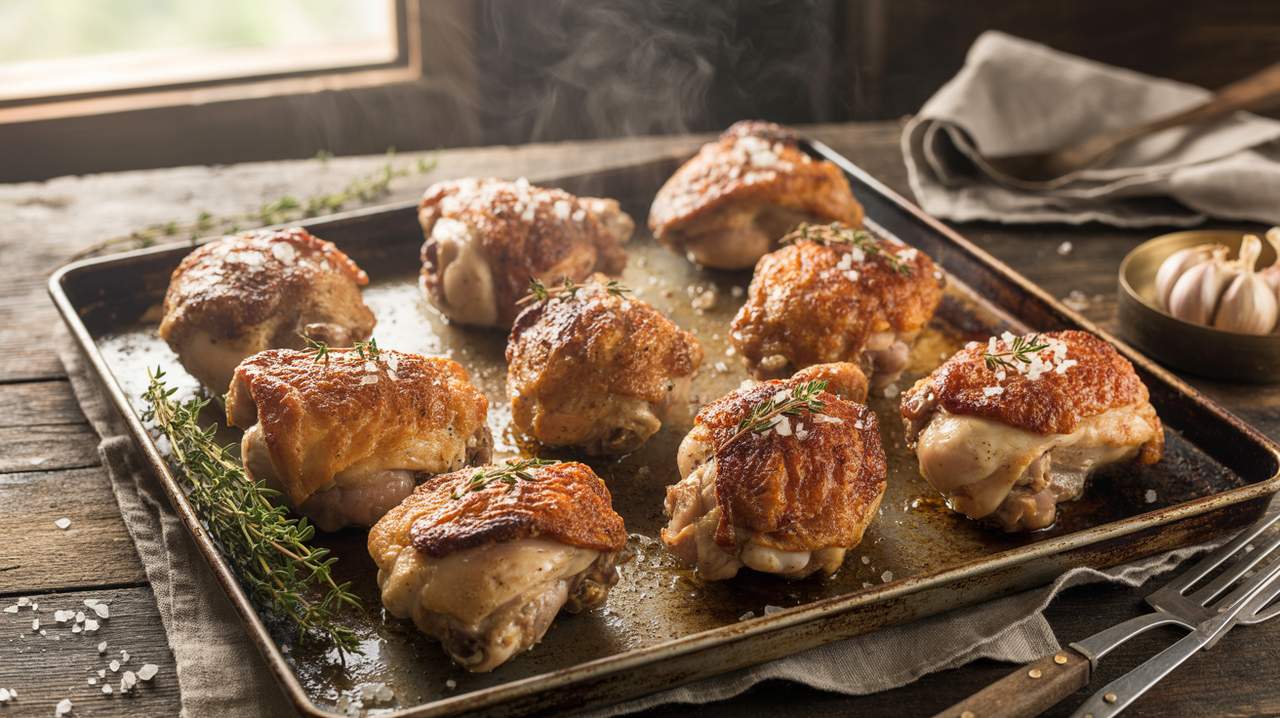
There’s something deeply satisfying about pulling a tray of golden, crackling chicken thighs out of the oven — skin so crispy it shatters when you bite into it, meat so juicy it practically falls off the bone. If you’ve ever struggled to get that kind of result at home without deep-frying, this recipe is going to change everything for you.
The secret is a combination of bone-in, skin-on thighs (the most forgiving cut of chicken there is), a simple but punchy dry rub, and a high-heat roasting method that renders the fat out of the skin while locking all those juices inside. No breading, no fuss, no babysitting the stove — just real, honest chicken that tastes like you spent hours on it.
This recipe works equally well on a weeknight when you’re short on time and a Sunday when you want something that feels like a proper meal. The prep takes about 10 minutes, the oven does the rest, and you end up with chicken that’s crispy on the outside, tender on the inside, and packed with flavor from edge to edge.
Helpful Products
Enter your email and we’ll send it straight to your inbox!
Love this recipe? Save it to Pinterest!

Did you make this recipe?
Leave a rating and let us know how it turned out! Your feedback helps other home cooks.
Ingredients
Crispy Baked Chicken Thighs
Nutrition
Per serving
- Daily Value*
-
Calories: 420 kcal
-
Protein: 38g76%
-
Carbs: 2g1%
-
Fat: 28g36%
-
Fiber: 0.5g2%
-
Sugar: 0g0%
-
Sodium: 620mg27%
Directions
Season the chicken thighs with a smoky spice rub, then roast them at high heat on a wire rack until the skin is shatteringly crispy and the meat is juicy all the way through.
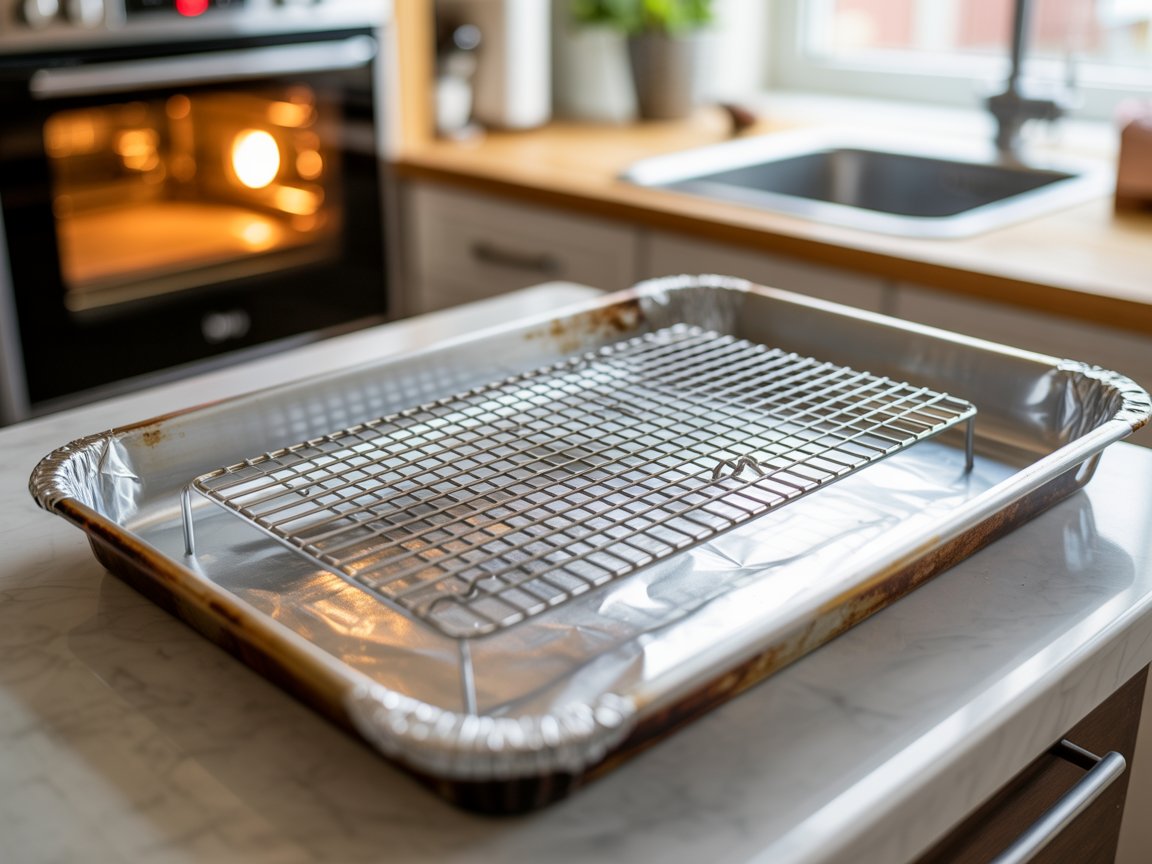
Step 1: Preheat the Oven and Prep the Pan
Preheat your oven to 425°F (220°C). This high heat is what drives the fat out of the skin and creates that deep golden crunch — don't be tempted to go lower.
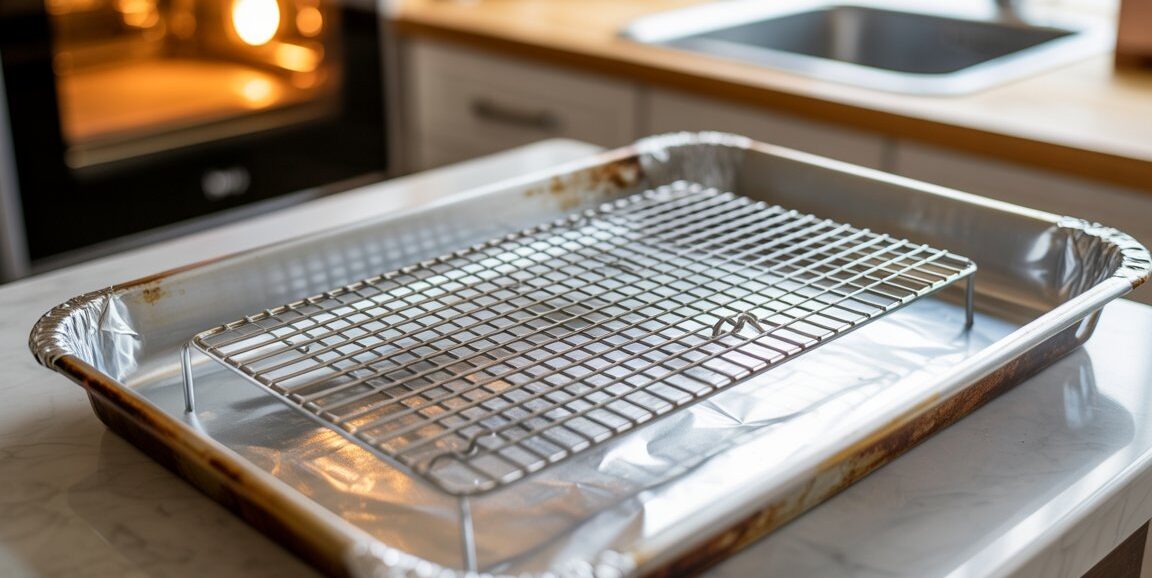
Line a large rimmed baking sheet with aluminum foil, then place a wire rack on top and lightly spray it with cooking spray. The rack lifts the chicken off the pan so hot air circulates underneath, crisping the bottom as well as the top.
If you don't have a wire rack, you can bake directly on the foil-lined pan — the skin will still get crispy on top, just not quite as much underneath.
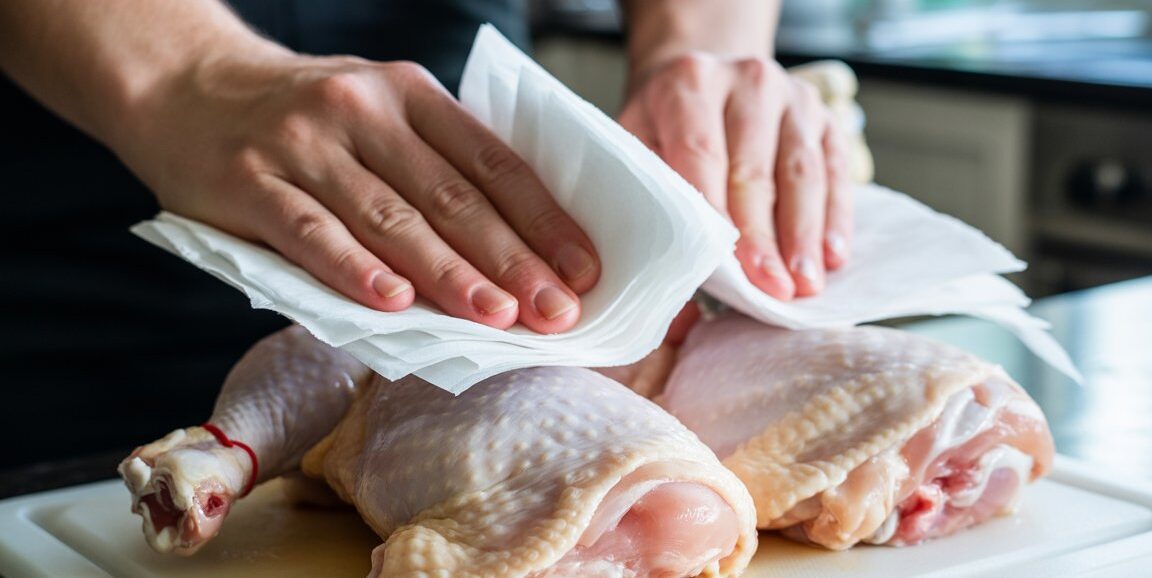
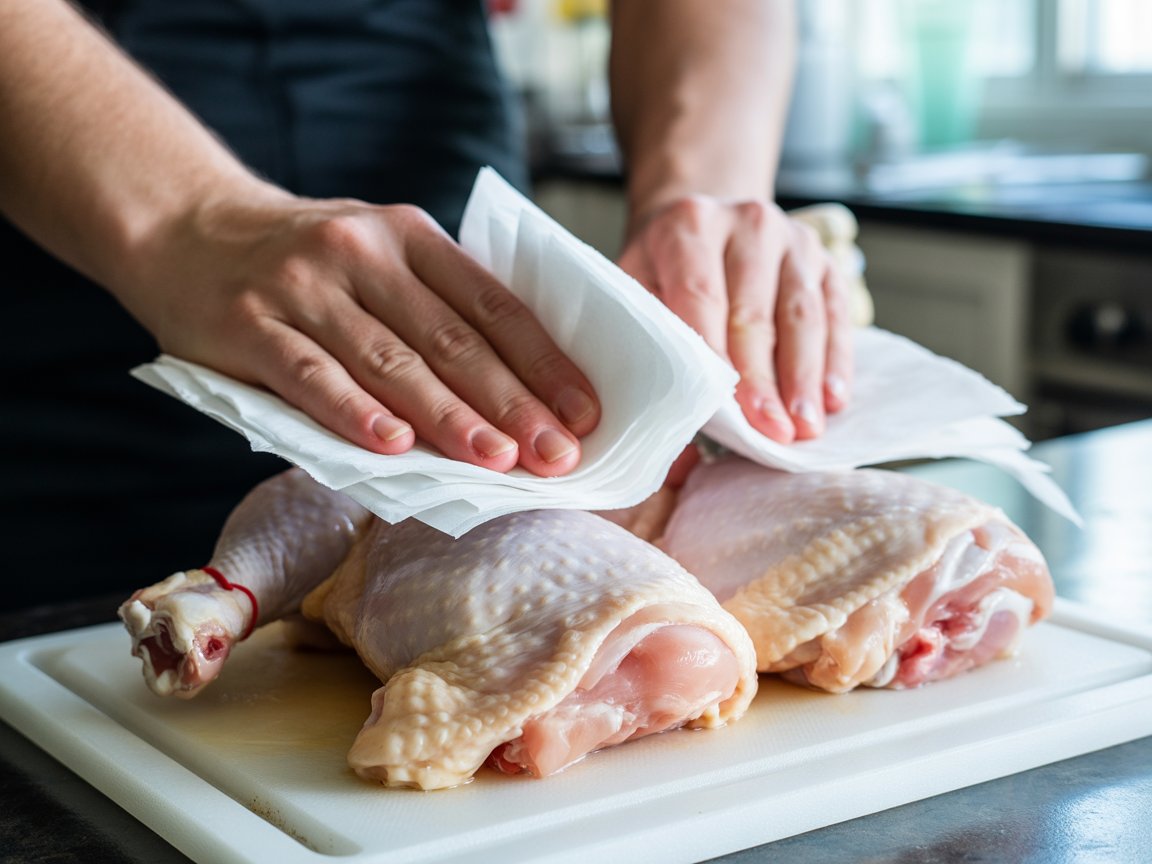
Step 2: Pat the Chicken Dry
Remove the chicken thighs from their packaging and use paper towels to thoroughly pat them dry — top, bottom, and sides. This step is non-negotiable for crispy skin.
Moisture on the surface of the chicken turns to steam in the oven, which softens the skin instead of crisping it. The drier the skin before it goes in, the crispier it comes out.
If you have time, you can leave the patted-dry thighs uncovered on a plate in the refrigerator for 1–2 hours (or overnight) to let the surface air-dry further. It makes a noticeable difference.
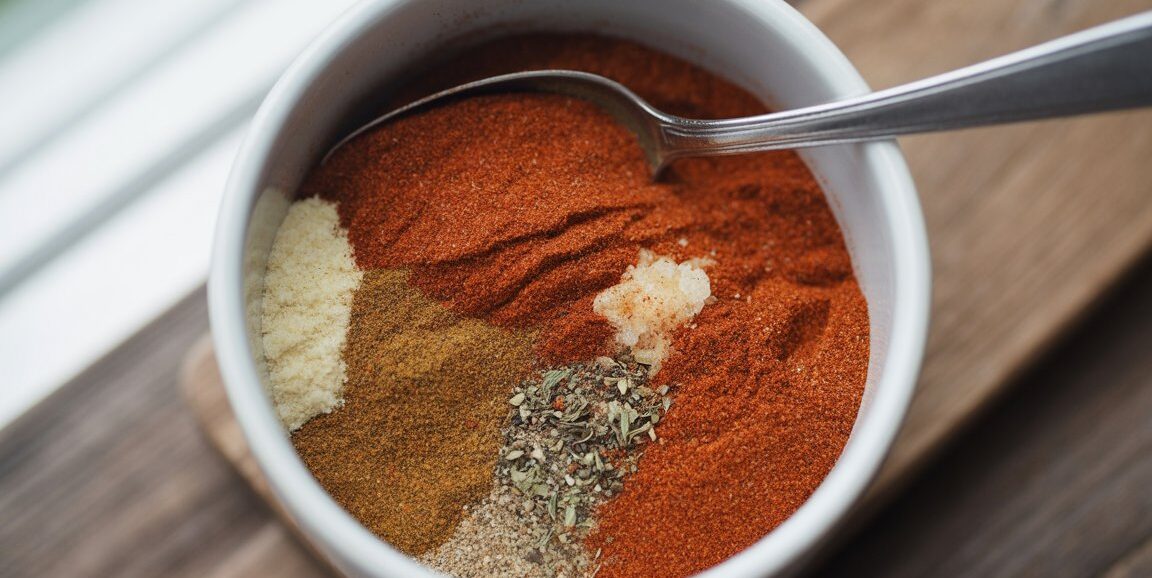
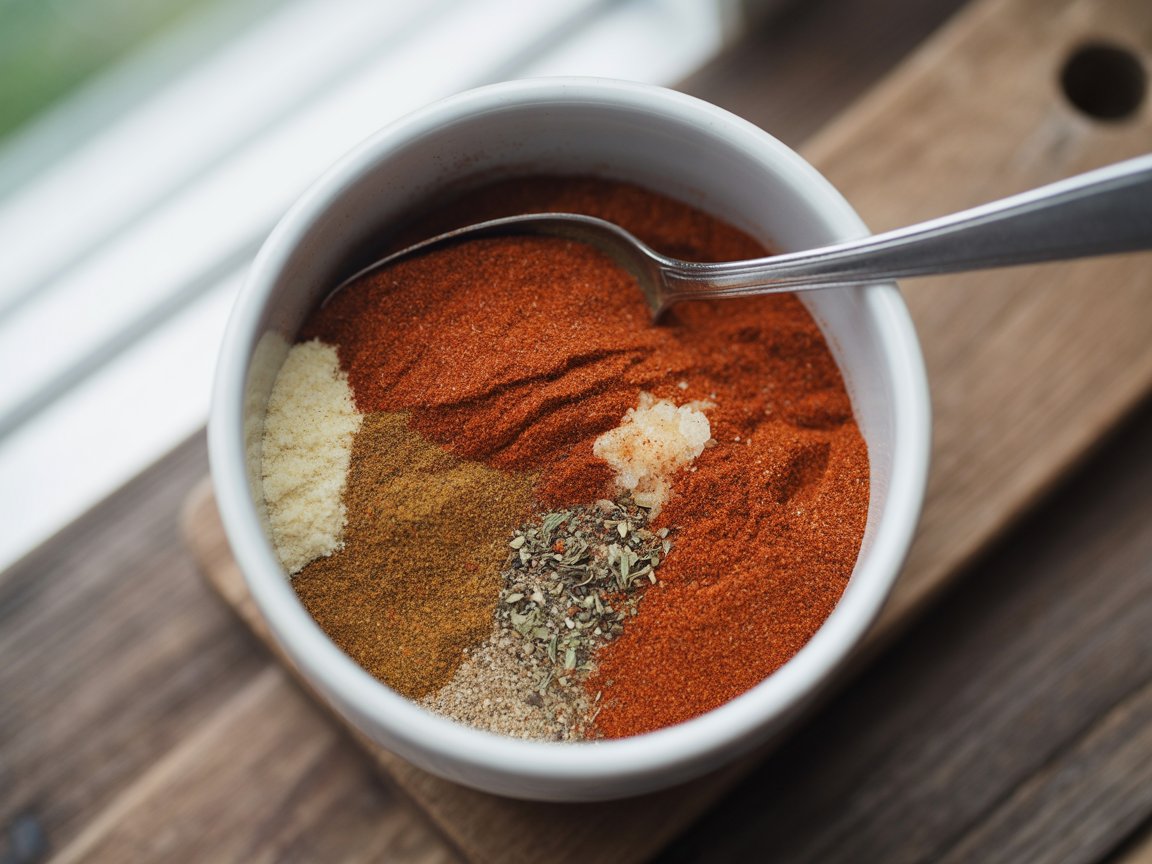
Step 3: Mix the Dry Rub
In a small bowl, combine the garlic powder, smoked paprika, onion powder, dried oregano, kosher salt, black pepper, cayenne pepper, and baking powder. Stir everything together until it's evenly mixed.
The baking powder is the secret weapon here — it slightly raises the pH of the skin, which accelerates browning and creates an extra-crispy, almost lacquered texture. You won't taste it in the finished dish.
Give the mixture a quick taste — it should smell smoky, savory, and a little spicy. Adjust the cayenne if you want more or less heat.

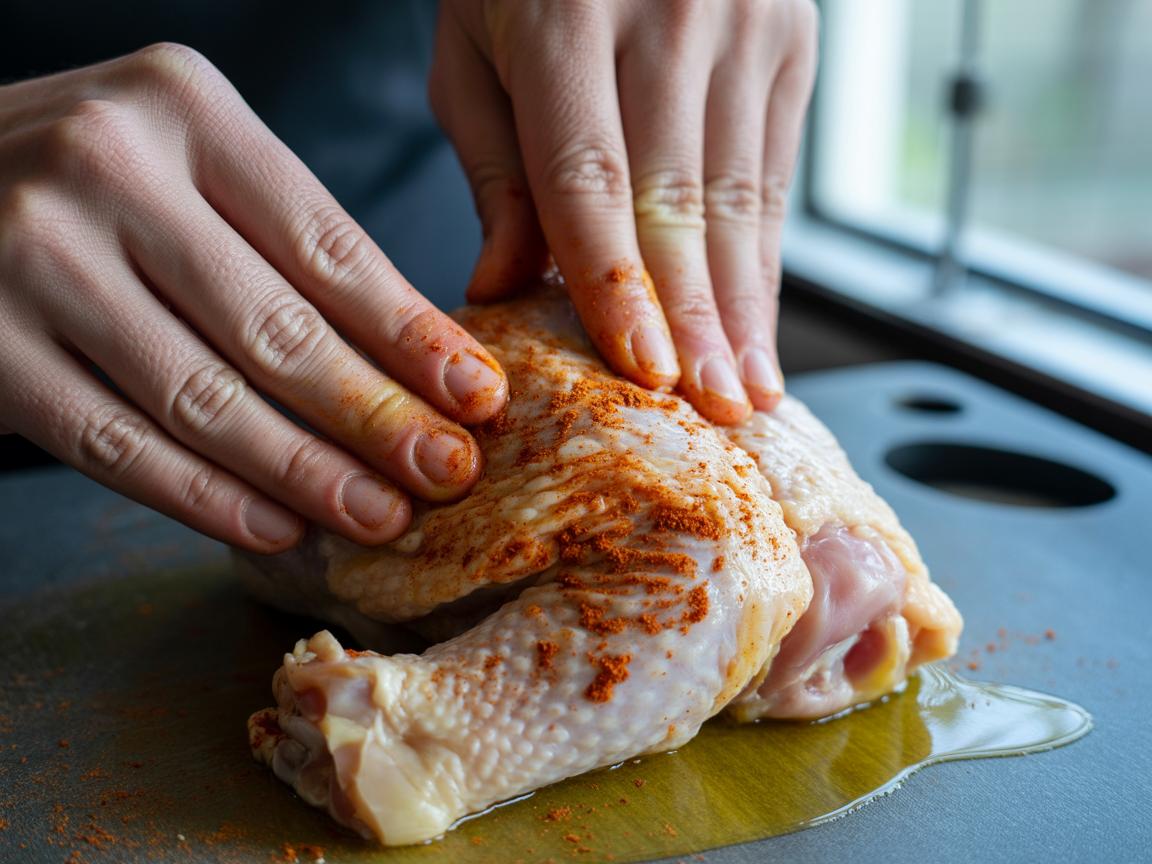
Step 4: Season the Chicken
Drizzle the olive oil over the chicken thighs and use your hands to coat each piece evenly — the oil helps the spice rub stick and encourages browning.
Sprinkle the dry rub generously over all sides of each thigh, pressing it gently into the skin so it adheres. Don't be shy — this is where all the flavor comes from.
Make sure to get some seasoning under the skin too if you can loosen it slightly with your fingers. Seasoning under the skin means flavor goes directly into the meat, not just on the outside.
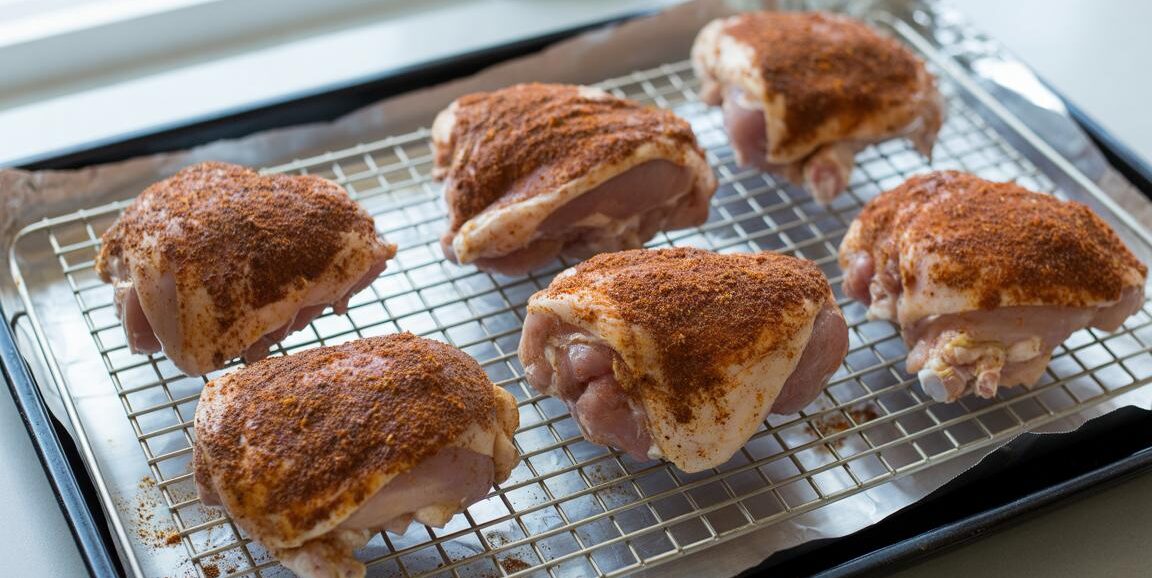
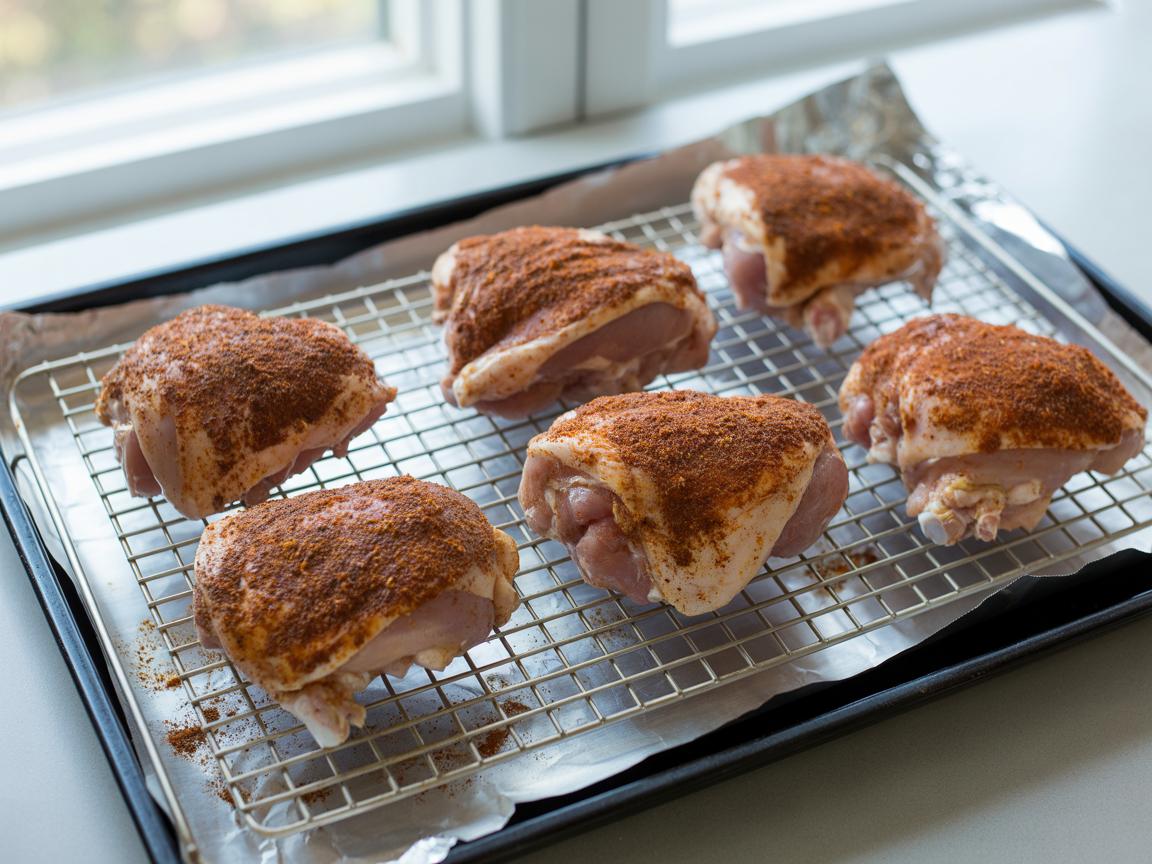
Step 5: Arrange on the Rack
Place the seasoned chicken thighs skin-side up on the prepared wire rack, spaced at least an inch apart. Crowding the pan traps steam and prevents the skin from crisping up properly.
If you have 8 thighs, use two baking sheets or bake in two batches rather than squeezing them all onto one crowded pan.
At this point the chicken should look beautifully coated — deep red-orange from the paprika with flecks of herbs all over the skin. It's going to look even better in 40 minutes.
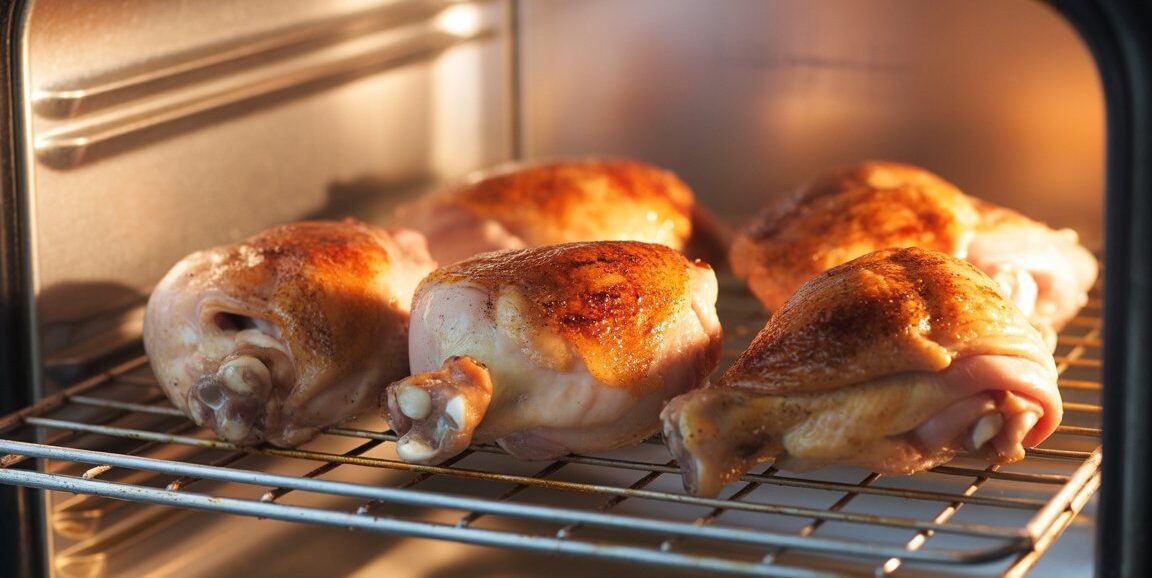
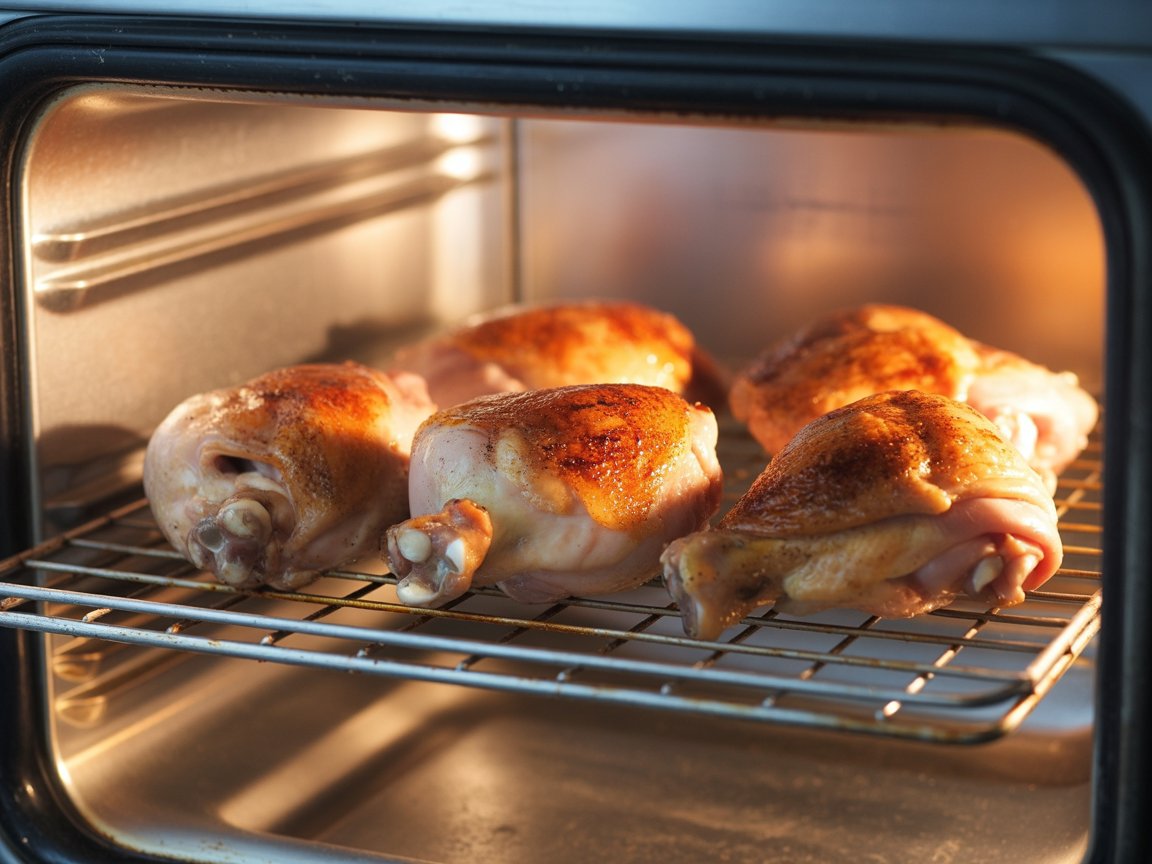
Step 6: Bake Until Golden and Crispy
Slide the pan into the preheated oven and bake for 35–40 minutes, or until the skin is deep golden brown and crackling. You should hear it sizzling toward the end — that's exactly what you want.
Resist the urge to open the oven or move the chicken around while it bakes. Let the heat do its work undisturbed for at least the first 30 minutes.
In the last 5 minutes, you can switch the oven to broil on high for an extra burst of color and crunch — just keep your eye on it so the skin doesn't burn. This step takes you from golden to gloriously dark and crispy.
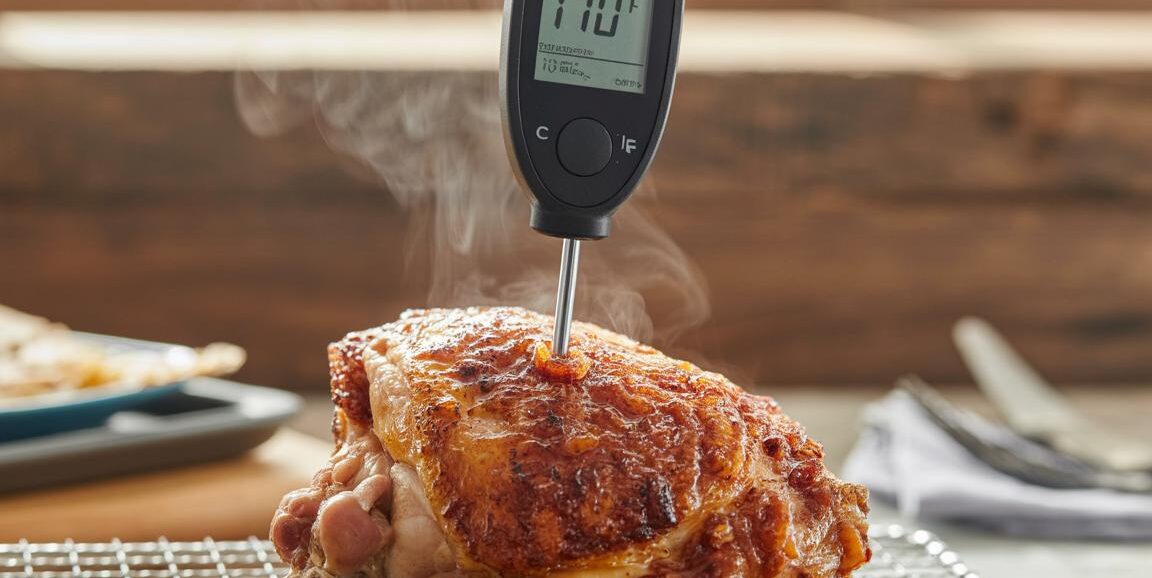
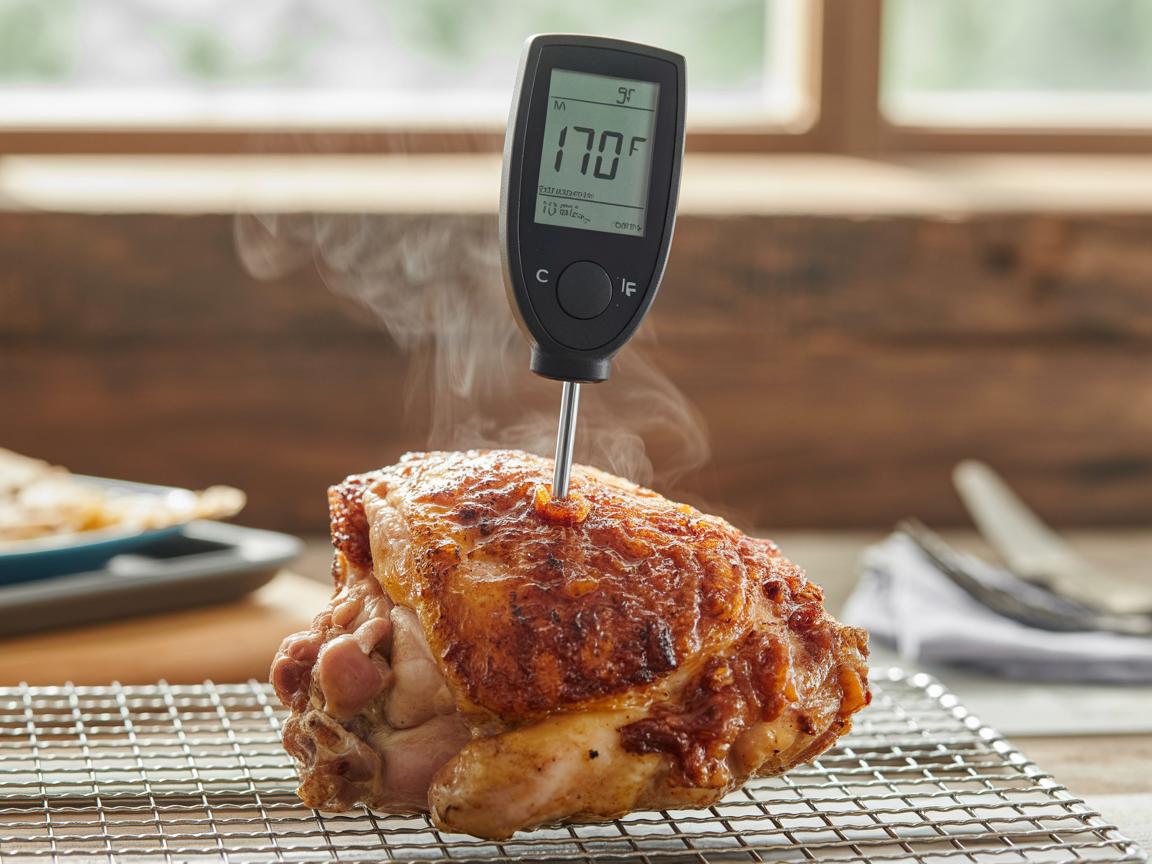
Step 7: Check Doneness and Rest
The chicken is done when an instant-read thermometer inserted into the thickest part (not touching bone) reads 165°F (74°C). Thighs are very forgiving — they stay juicy even up to 175°F, so don't stress if yours reads a few degrees higher.
Remove the pan from the oven and let the chicken rest on the rack for 5 minutes before serving. Resting lets the juices redistribute through the meat so they don't all pour out the moment you cut in.
The skin will stay crispy as it rests — this isn't like frying where it softens quickly. You have a good 15 minutes before it starts to lose its crunch.
Leave a Review