-
Prep Time15 Minutes
-
Cook Time70 Minutes
-
Serving4
-
Serving Size1/4 Chicken
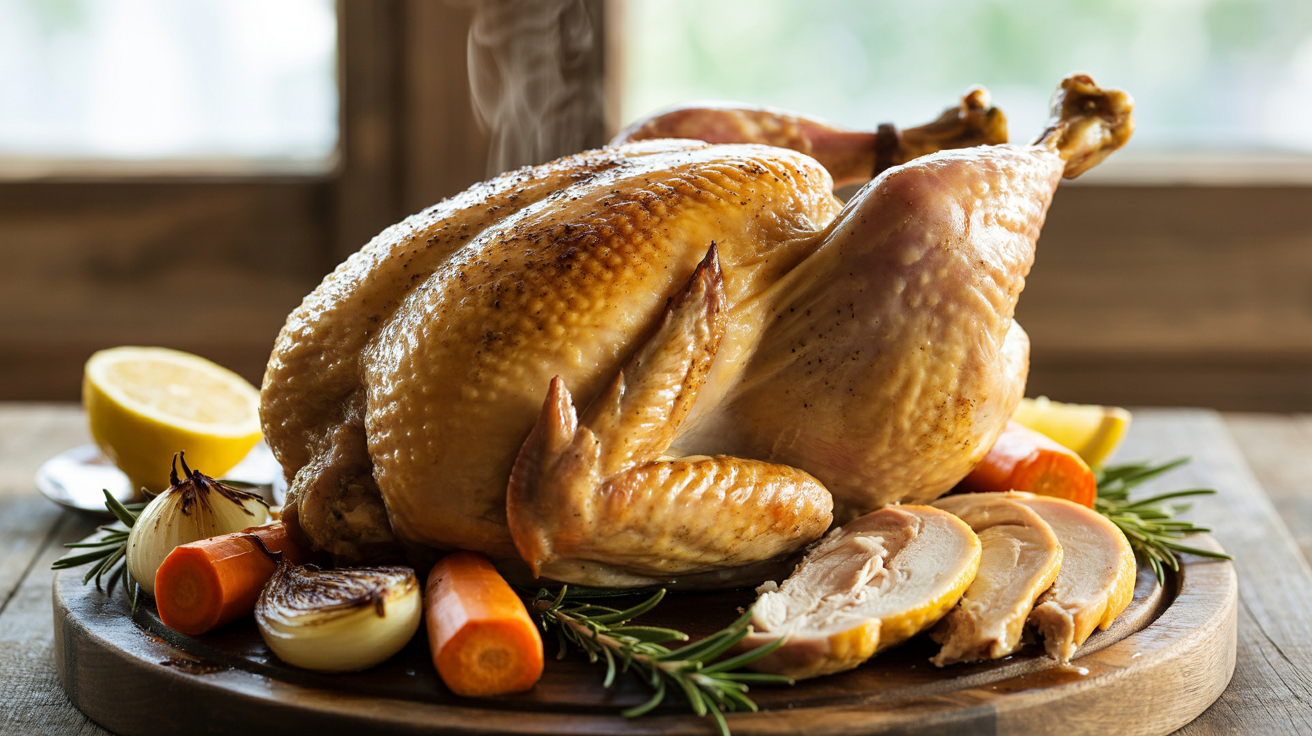
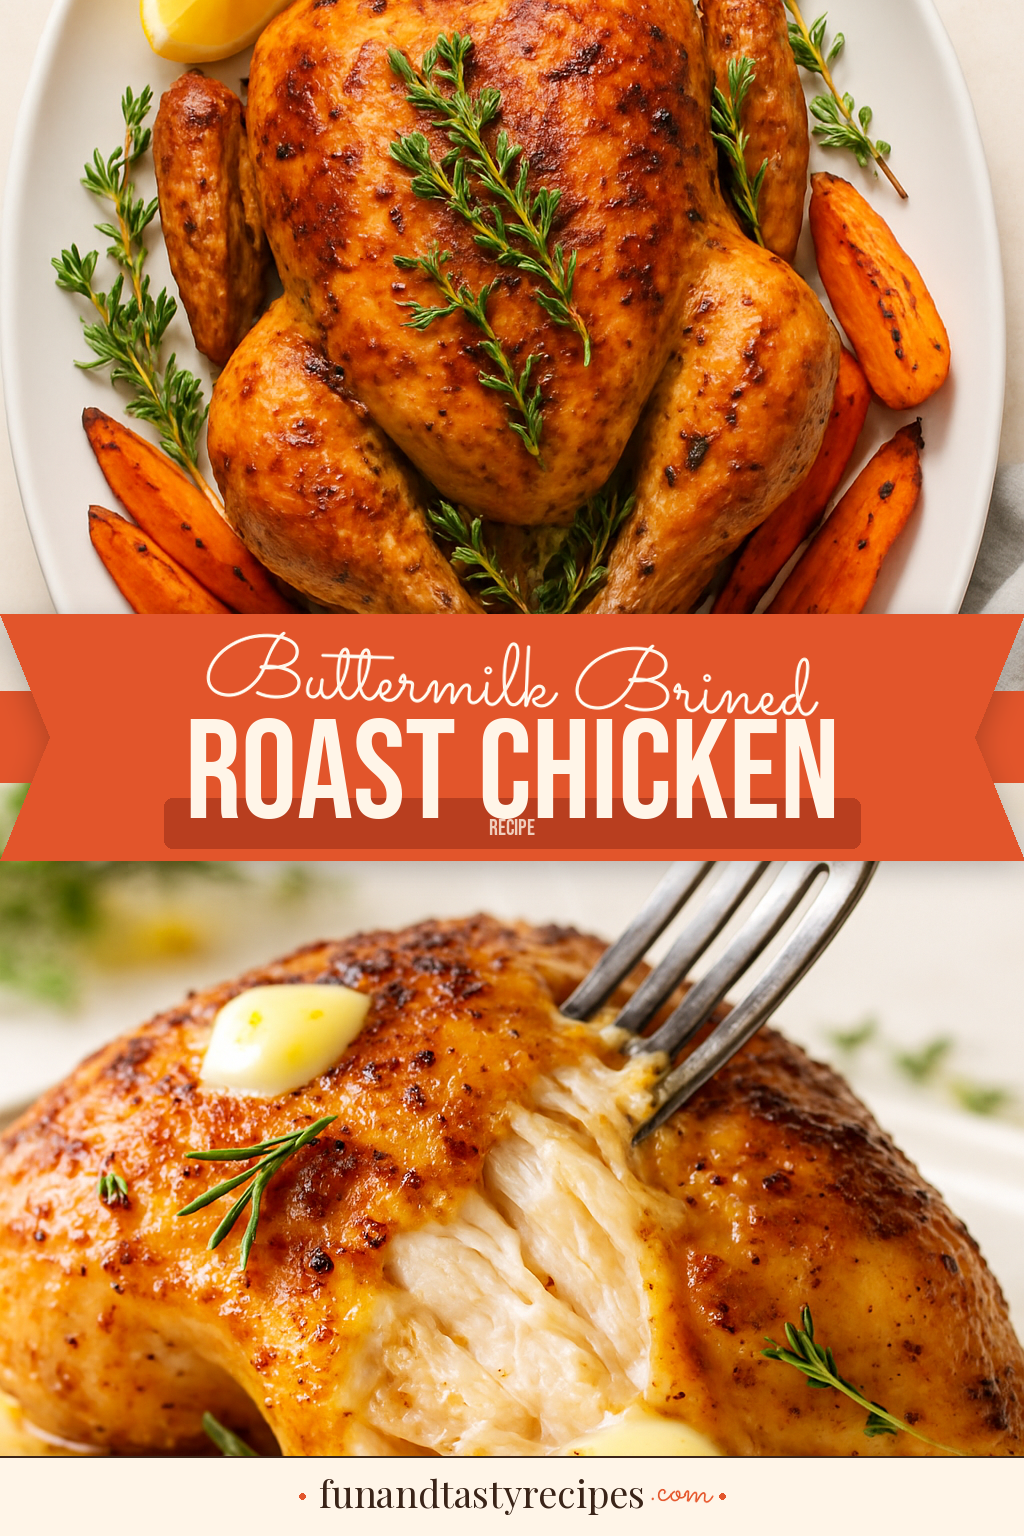
There’s something almost magical about a perfectly roasted chicken — golden, crackling skin that shatters at the first cut, meat so juicy it practically bastes itself, and a flavor that makes everyone at the table go quiet for a second before reaching for seconds. If you’ve ever pulled a roast chicken out of the oven that turned out dry or bland, this recipe is the answer you’ve been looking for. The secret is an overnight buttermilk brine that does all the heavy lifting while you sleep.
Buttermilk is mildly acidic, which gently breaks down the muscle fibers in the chicken without turning the texture mushy the way a harsh vinegar-based brine can. It also carries salt deep into the meat, seasoning every bite from the inside out — not just the surface. The result is chicken that’s genuinely juicy all the way to the breast, even after a full hour in a hot oven. Garlic, fresh thyme, and a hit of black pepper in the brine add a savory aromatic backbone that comes through in every bite.
This recipe takes just 15 minutes of hands-on prep. The rest is patience — let the brine work overnight, then roast at high heat for skin that crisps like you’d get at a restaurant. Whether you’re cooking for Sunday dinner, a special occasion, or just want to feel like you really nailed it in the kitchen, this buttermilk brined roast chicken delivers every single time.
Helpful Products
Enter your email and we’ll send it straight to your inbox!
Love this recipe? Save it to Pinterest!
Did you make this recipe?
Leave a rating and let us know how it turned out! Your feedback helps other home cooks.
Ingredients
Buttermilk Brined Roast Chicken
Nutrition
Per serving
- Daily Value*
-
Calories: 520 kcal
-
Protein: 48g96%
-
Carbohydrates: 6g2%
-
Fat: 32g41%
-
Saturated Fat: 10g50%
-
Fiber: 1g4%
-
Sugar: 4g
-
Sodium: 820mg36%
Directions
You'll brine the chicken overnight for maximum juiciness, then roast it at high heat for crackling golden skin — most of the work is hands-off and the oven does the rest.
Step 1: Make the Buttermilk Brine
In a large mixing bowl or measuring jug, whisk together the buttermilk, kosher salt, black pepper, smashed garlic cloves, lemon zest, smoked paprika, and onion powder until the salt is fully dissolved.
Give it a taste — it should be pleasantly salty and aromatic. This is the seasoning engine for the entire bird, so don't be shy with the salt here.
Add the fresh thyme sprigs and stir to combine. Set the brine aside while you prepare the chicken.
Step 2: Prep and Brine the Chicken
Remove the chicken from its packaging and pat it completely dry with paper towels — inside the cavity too. Removing surface moisture now helps the brine absorb more efficiently.
Place the chicken into a large zip-lock bag or a deep baking dish. Pour the buttermilk brine over and around the chicken, making sure it gets into the cavity as well.
Seal the bag (or cover the dish tightly with plastic wrap) and refrigerate for a minimum of 8 hours, but ideally overnight — 12 to 24 hours is the sweet spot for the juiciest result.
Step 3: Bring the Chicken to Room Temperature
When you're ready to roast, remove the chicken from the refrigerator and let it sit at room temperature for 45 minutes to 1 hour.
This step matters more than most people realize — a cold bird going straight into a hot oven cooks unevenly, leaving you with overdone legs and an undercooked breast. Tempering the chicken ensures even cooking all the way through.
While the chicken rests, preheat your oven to 425°F (220°C) and position a rack in the lower-middle of the oven.
Step 4: Dry and Butter the Chicken
Lift the chicken out of the brine and let the excess drip off. Pat the entire surface very dry with paper towels — including under the skin if you can loosen it gently with your fingers. Dry skin equals crispy skin. This step is non-negotiable.
Rub the softened butter underneath the breast skin, pushing it as far as you can. Then rub the olive oil all over the outside of the bird. Season lightly with a pinch of salt and black pepper — the brine has already done most of the seasoning work.
Stuff the cavity with the halved lemon, a few garlic cloves, and the rosemary sprigs. These aromatics perfume the meat from the inside as it roasts.
Step 5: Build the Roasting Bed
Scatter the quartered onion and roughly chopped carrots across the bottom of a roasting pan or large oven-safe skillet. These vegetables act as a natural roasting rack, lifting the chicken off the pan so hot air circulates underneath for even browning.
They also catch all the dripping juices and rendered fat as the chicken cooks — which means incredibly flavorful pan drippings you can use for a simple jus or gravy.
Place the chicken breast-side up on top of the vegetables, tucking the wing tips underneath so they don't burn.
Step 6: Roast the Chicken
Place the pan in the preheated 425°F oven and roast for 20 minutes at high heat — this initial blast of heat is what sets the crispy skin. You should start smelling the chicken and hearing a steady sizzle from the pan.
After 20 minutes, reduce the oven temperature to 375°F (190°C) and continue roasting for another 45 to 50 minutes, or until an instant-read thermometer inserted into the thickest part of the thigh (not touching bone) reads 165°F (74°C).
The skin should be deep golden brown and crackling. If the skin starts to get too dark before the bird reaches temperature, loosely tent with foil.
Step 7: Rest Before Carving
This is the step most home cooks skip — and it's why their chicken ends up dry on the plate. Transfer the chicken to a cutting board and let it rest uncovered for at least 15 minutes before carving.
During resting, the internal juices redistribute evenly throughout the meat. If you cut into it immediately, all those juices run out onto the board instead of staying in the meat where they belong.
While the chicken rests, you can spoon the pan drippings over the vegetables or strain them into a small saucepan and simmer for 2–3 minutes for a quick jus.
Step 8: Carve and Serve
Using a sharp carving knife, start by removing the legs — cut through the skin between the leg and breast, then bend the leg back until the joint pops. Slice through the joint to separate the leg and thigh.
Next, remove the breasts by running the knife along each side of the breastbone, following the rib cage down with clean, confident strokes. Slice the breast meat crosswise for presentation.
Arrange on a platter with the roasted vegetables and a drizzle of pan jus. Finish with a small squeeze of the roasted lemon from the cavity — it will have mellowed and sweetened beautifully during roasting.
Leave a Review