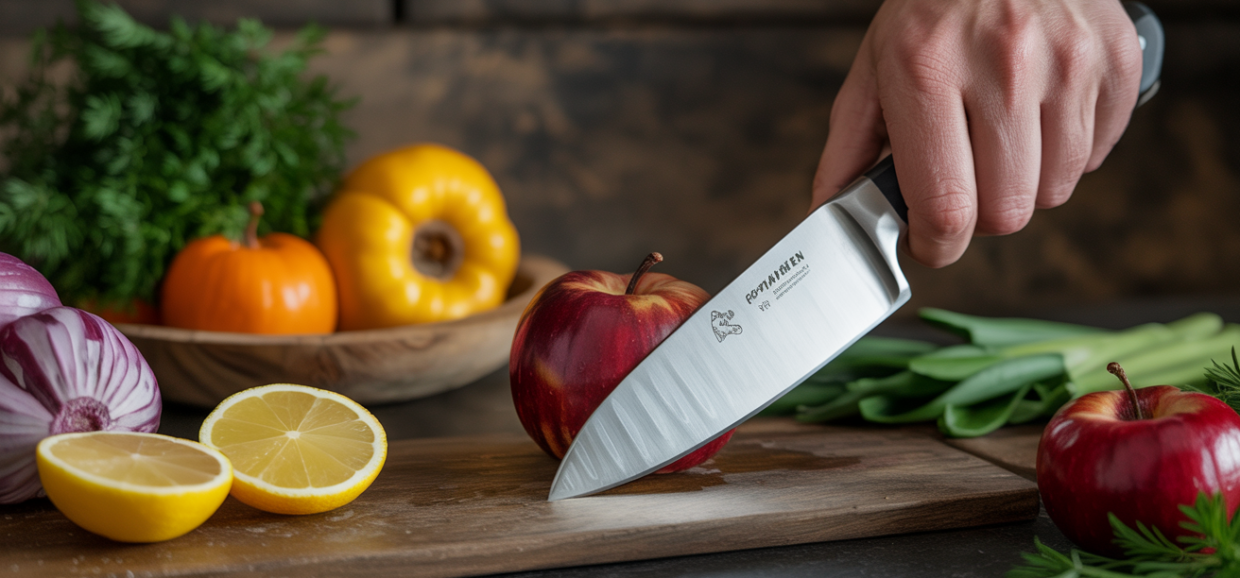
Here’s something most home cooks don’t realize: a dull knife is more dangerous than a sharp one. When a blade won’t cut cleanly, you apply more pressure — and when you apply more pressure, slips happen. The knife goes sideways instead of through. That’s when people cut themselves.
As an Amazon Associate, this site earns from qualifying purchases. Some links on this page are affiliate links.
The other thing most people don’t realize is that their knives are probably dull right now. Not edge-of-a-butter-knife dull, but not sharp enough to do their jobs easily either. And the reason is almost never the knife itself — it’s that no one ever explained the difference between honing and sharpening, or which tool to actually start with.
This guide fixes both problems. We’ll clear up the honing vs. sharpening confusion in plain language, walk you through the method that works best for beginners, and give you a simple test to know when your knife is actually sharp. No special skills needed. If you can follow directions, you can have sharp knives.
Honing vs. Sharpening: What’s the Difference (and Why It Matters)
Most people use these words interchangeably. They’re not the same thing, and mixing them up leads to a lot of wasted effort and a lot of still-dull knives.
Sharpening means grinding metal away to create a new edge. You do this when the blade is genuinely dull — when it won’t cut properly even after honing. Sharpening removes material. Done with a whetstone, a pull-through sharpener, or an electric sharpener.
Honing means realigning the existing edge without removing metal. Here’s what actually happens to a knife with regular use: the thin metal edge doesn’t disappear — it folds and rolls to one side, like a bent piece of foil. The blade looks dull because the edge is no longer pointing straight down. A honing rod straightens it back into alignment. Done correctly before every cooking session, honing keeps a sharp knife sharp for much longer.
The analogy that makes it click: sharpening is like cutting a new ruler from wood. Honing is like straightening a ruler that got slightly bent. Most of the time, you need the second thing, not the first.
What this means practically: most home cooks only need to sharpen their knives once or twice a year. But honing should happen before every cooking session. That 20-second habit before you start prepping is what keeps your knife feeling sharp between annual sharpenings.
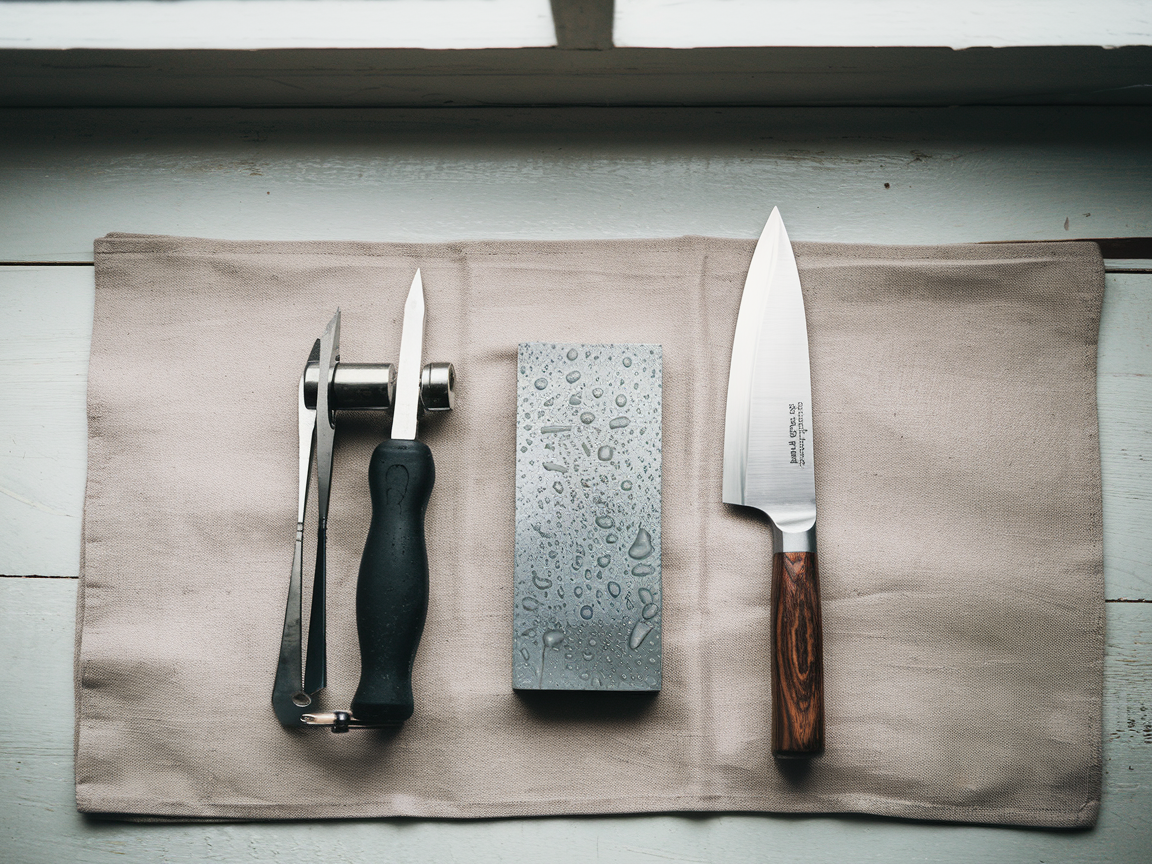
The 3 Main Tools (And Which One to Start With)
There are three tools worth knowing about, and they’re not interchangeable. Here’s an honest breakdown of each and when to use them.
Pull-through sharpener — The right starting point for most home cooks. It has preset angle slots that do the angle work for you. You pull the blade through the coarse slot a few times, then the fine slot, and you’re done. Takes about 90 seconds. The tradeoff is control — pull-through sharpeners remove more metal per pass than a whetstone, which means they’re slightly more aggressive. But for most home cooks using consumer knives, this is not a meaningful downside.
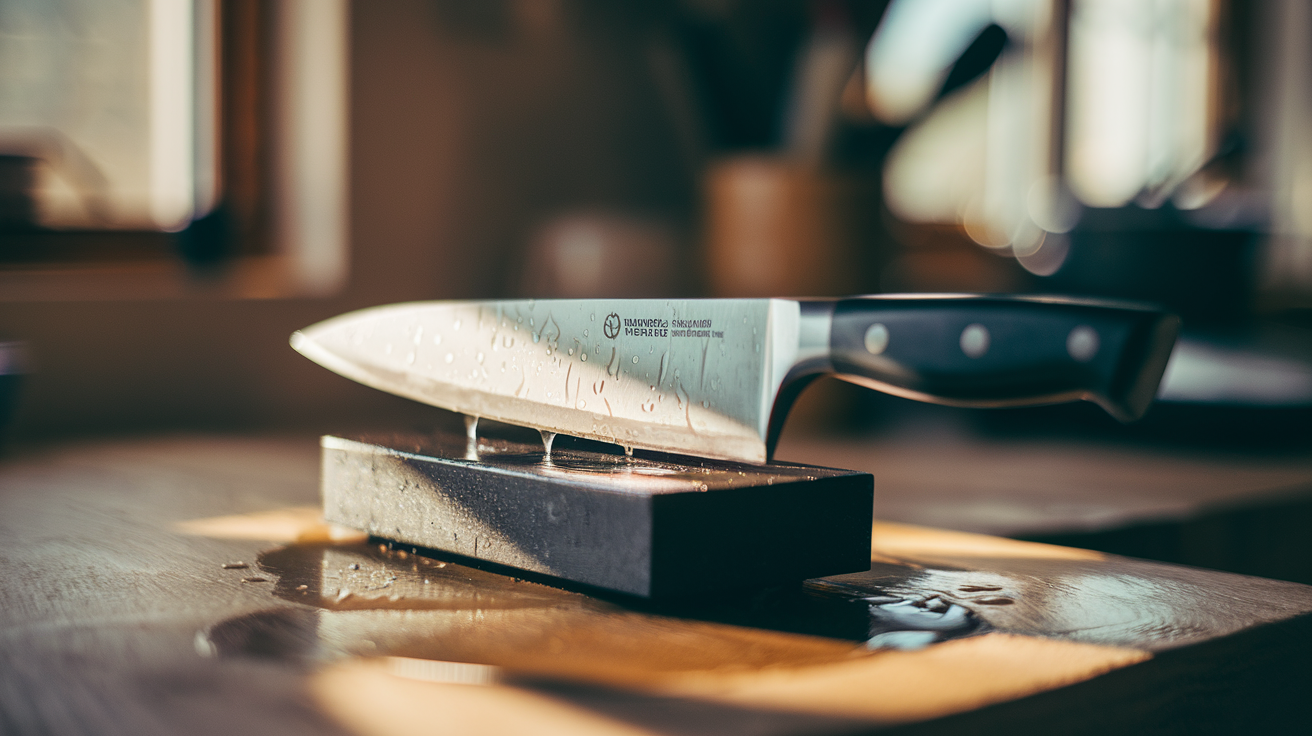
Whetstone — The gold standard for sharpening results. A whetstone gives you full control over angle and pressure, which means better results once you know what you’re doing. The learning curve is real — it takes a few sessions before muscle memory takes over and you can hold a consistent angle. But if you care about your knives and want to get the most out of them, this is what you build toward.
Electric sharpener — Fast and consistent, with preset angles like a pull-through. The main concern is aggressiveness: electric sharpeners remove material quickly, which shortens a knife’s life over years of use. A decent chef’s knife used regularly with an electric sharpener every month will wear down noticeably faster than one maintained with a whetstone or occasional pull-through use. Fine for beater knives, less ideal for anything you’ve invested in.
Honing rod — Not a sharpener. A honing rod realigns the edge but doesn’t grind new metal. Buy one alongside whichever sharpening tool you choose and use it before every cooking session. It costs $15–$30 and pays for itself immediately.
The recommendation: Start with a pull-through sharpener and a honing rod. Once sharpening feels routine and you want more precision, learn the whetstone. Do not start with a whetstone and give up after one frustrating session — that’s the most common way people abandon knife maintenance entirely.
How to Use a Pull-Through Sharpener (Step-by-Step)
Pull-through sharpeners are almost foolproof if you follow a few simple rules. The most important: light pressure. Let the sharpener do the work, don’t muscle the blade through it.
- Place the sharpener on a stable surface. Most have a rubber base. Put it on a cutting board or countertop where it won’t slide. Hold the handle with your non-dominant hand.
- Start in the coarse slot. The coarse (usually marked “C” or with a wider gap) removes metal and sets the new edge. Place the heel of the blade in the slot and pull smoothly toward you, finishing at the tip. Keep the blade vertical — no tilting side to side. Use light, consistent pressure.
- Pull 3 to 5 times through the coarse slot. Count the strokes. You don’t need more than 5 passes for a dull knife.
- Move to the fine slot. The fine slot (usually “F” or a narrower gap) polishes the edge and removes the tiny burr left by the coarse slot. 3 to 5 passes here as well.
- Rinse the blade before using. Sharpening leaves micro-particles of metal on the blade. A quick rinse under cold water removes them. Pat dry.
That’s it. The whole process takes under two minutes. Run the paper test (below) to confirm the edge before you start cooking.
How to Use a Whetstone (Step-by-Step)
The whetstone takes more practice than a pull-through sharpener, but the results are noticeably better once the technique clicks. The goal is a consistent angle across the entire length of the blade — that’s the part that takes repetition to nail.
- Soak the stone before use. Submerge it in water for 5 to 10 minutes before you start. A dry stone cuts poorly and can overheat. During sharpening, a small amount of water (or a mix of water and honing oil for oil stones) keeps the surface lubricated.
- Set the stone on a damp towel. This prevents it from sliding during sharpening. Some whetstones come with a base — use it. If yours doesn’t, a folded damp kitchen towel works well.
- Find the correct angle. Western-style knives (German brands, most chef’s knives) sharpen at approximately 20 degrees. Japanese-style knives (thinner, harder steel) sharpen at approximately 15 degrees. A rough way to find 15–20 degrees: lay the blade flat on the stone (0 degrees), then raise the spine until a matchbook fits under it — that’s roughly 15 degrees. Two matchbooks is closer to 20 degrees.
- Start on the coarse side. Most whetstones have two grits: coarse (lower number, like 400–1000) and fine (higher number, like 2000–3000). Begin with the coarse side. Hold the angle and push the blade away from you in a slight arcing motion, moving heel to tip as you go. Apply moderate pressure on the push stroke, light pressure on the return.
- Sharpen one side fully before switching. Do 8–10 strokes on one side, then switch. Equal strokes on each side.
- Move to the fine side and repeat. Flip the stone and do the same process on the fine grit. This removes the burr left by the coarse side and polishes the edge.
- Strop the blade if possible. Stropping (running the blade on leather or even cardboard) removes the final microburr and aligns the very tip of the edge. This step is optional but produces a noticeably sharper result.
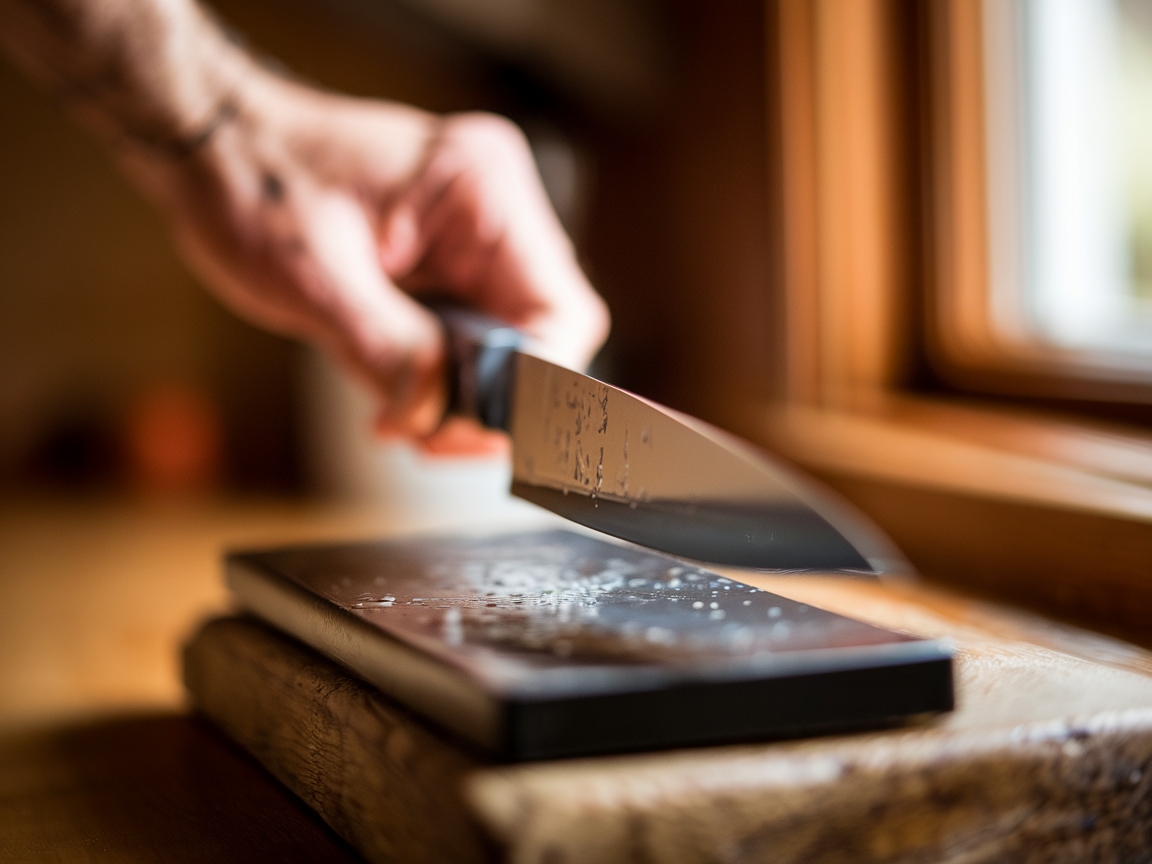
How to Hone a Knife Correctly
Honing is the most frequently skipped step in home knife care, and it’s the easiest to learn. Do this before every cooking session and your knives will stay sharp dramatically longer between actual sharpenings.
- Hold the honing rod vertically. Place the tip of the rod on a cutting board with the handle pointing up. This gives you control and keeps the rod stable. Alternatively, hold the rod horizontally in your non-dominant hand — whichever feels more controlled.
- Position the knife at 15–20 degrees to the rod. Same angle as sharpening: roughly the width of two to three business cards between the spine of the knife and the rod.
- Slide the blade down the rod, heel to tip. Apply light to moderate pressure. The motion is a controlled sweep — not a fast slash. Think smooth and deliberate.
- Alternate sides. Do 6 to 8 strokes per side, alternating left and right to realign both faces of the edge evenly.
The whole process takes about 20 seconds once it’s habit. Do it before you start prepping dinner — not after, when you’re in a hurry and more likely to skip it.
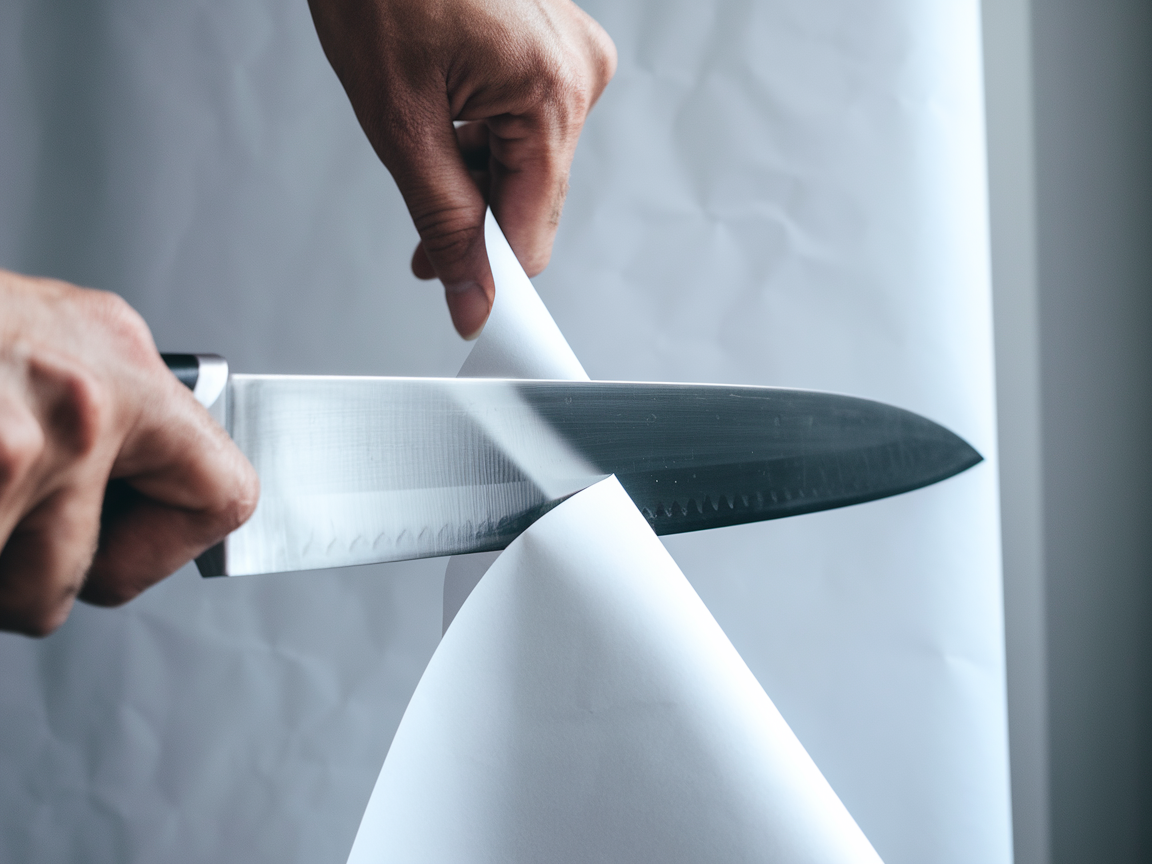
The Paper Test: How to Know When Your Knife Is Sharp Enough
Once you’ve sharpened or honed, you need to confirm the edge actually improved. The paper test is the most reliable quick check, and you can do it with any sheet of printer paper.
Hold a sheet of paper vertically by the top edge. Starting at the heel of the blade, slice downward through the paper from top to bottom in a single controlled motion. A sharp knife slices through cleanly with a crisp sound and a straight line. A dull knife tears the paper, catches on it, or requires pressure to push through.
If the knife tears instead of slices, run it through the sharpener again and retest. This immediate feedback loop is what makes the paper test so useful — you know within 10 seconds whether you’re done or need another pass.
An alternative if you don’t have paper handy: the tomato test. A truly sharp knife should slice through the skin of a ripe tomato with zero downward pressure — the weight of the blade alone should be enough to start the cut. If you’re pressing down, the knife needs work.
How Often Should You Sharpen Kitchen Knives?
This is the question most guides dodge, and the confusion it creates leads to two failure modes: people who sharpen obsessively and wear down their blades, and people who never sharpen at all. Here’s the actual answer.
- Hone: Before every cooking session. Takes 20 seconds. This is maintenance, not sharpening. Do this every time without exception.
- Sharpen with pull-through or whetstone: Once or twice a year for a home cook using their knife 4–5 times a week. If you hone regularly, you rarely need to sharpen. Most home cook knives go 12–18 months between true sharpenings.
- Signs you’ve waited too long: The paper test fails (tears instead of slices). Ripe tomatoes get crushed instead of cut. Onion slices compress before the blade cuts through.
The single biggest upgrade most home cooks can make isn’t buying a better knife — it’s honing the knife they already own before each use. Most home kitchen knives could perform significantly better immediately, just from that one habit.
Frequently Asked Questions
Can I sharpen a knife without a sharpener?
In a pinch, yes — the unglazed ceramic ring on the bottom of a coffee mug acts as a mild abrasive and can touch up a knife in the same way a very coarse whetstone would. Hold the blade at 20 degrees and pull the edge along the ceramic ring a dozen times per side. It’s not a substitute for proper sharpening, but it works when you have nothing else available.
Does sharpening a knife wear it down?
Yes, slightly — sharpening removes metal to create a new edge. This is why you want to sharpen as infrequently as possible (once or twice a year) and maintain the edge with honing in between. Over 20 years of regular sharpening, a knife’s blade will noticeably narrow. That’s normal and expected. It’s not a reason to avoid sharpening — a sharp narrow knife is more useful than a wide dull one.
What angle should I sharpen my kitchen knife?
Western-style knives (most German brands, like Wüsthof or Henckels): 20 degrees. Japanese-style knives (Shun, Global, MAC): 15 degrees. Many knives have this written in the product description or manual. When in doubt, 20 degrees is a safe default for any knife you’re unsure about.
Is it worth buying a whetstone for home use?
If you cook 4–5 nights a week, yes. A decent dual-grit whetstone costs $25–$50 and will outlast any knife you own. The learning curve is real — expect 2–3 sessions before the technique feels natural. If you’re not ready to invest the practice time, a good pull-through sharpener produces results that are good enough for most home cooking situations.
Your Knives Will Thank You
The habit is simple: hone before every cooking session, sharpen once or twice a year, always confirm with the paper test. Once those three things become routine, dull knives stop being a problem you think about.
Sharp knives make every recipe easier, every prep faster, and every cut safer. Browse our cooking tips archive for more guides like this, or explore our chef secrets section for the technique upgrades that actually change your cooking.
