If you’ve ever bought a cast iron skillet and wondered why your food sticks, why it looks dull, or why rust keeps showing up no matter what you do — the answer almost always comes down to one thing: improper seasoning. A well-seasoned cast iron pan is basically magic. It becomes naturally non-stick, it adds a subtle depth of flavor to everything you cook, and with the right care, it will genuinely outlast you. I’m not exaggerating. People pass these things down through generations like heirlooms.
But here’s the thing — there’s a lot of bad advice floating around about how to season cast iron. Some of it is outdated, some of it is just flat-out wrong, and following it can leave you frustrated with a pan that performs worse than a dollar-store skillet. So let’s fix that today. I’m going to walk you through exactly how to season a cast iron skillet the right way, from the very first wash to building up those beautiful dark layers that make cast iron cooking so rewarding. Whether you’re starting from scratch with a brand-new pan or trying to rescue a rusty old one from a garage sale, this guide has you covered.
Step 1: Start With a Thorough Cleaning
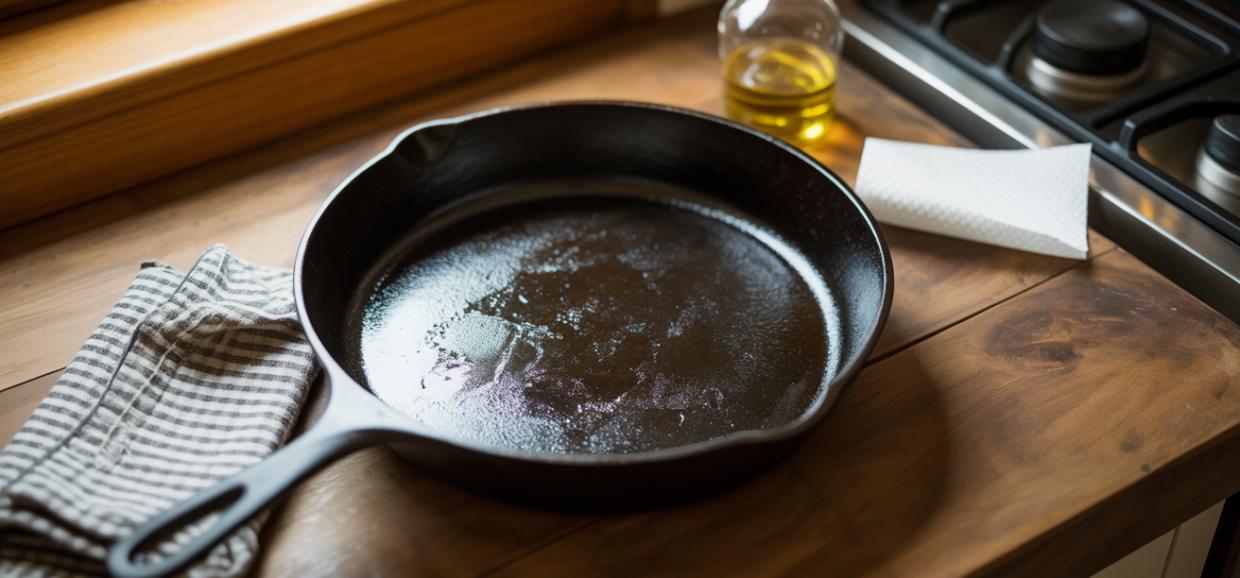
Before you do anything else, you need to get your skillet completely clean. If it’s brand new, give it a good wash with warm water and a small amount of dish soap. Yes, you can use soap on cast iron — just not habitually after seasoning is built up. For a new pan, this initial wash removes any factory coatings, dust, or residue from the manufacturing process. Scrub it thoroughly with a stiff brush or a non-scratch scrub pad, then rinse it completely under hot water.
If you’re working with a vintage or rusty skillet, the process is a bit more involved. Use a chainmail scrubber or even fine steel wool to remove all the rust and flaking old seasoning. You want to get down to bare, clean metal — don’t be shy about it. Rust is your enemy at this stage, and no amount of oil will fix a surface that hasn’t been properly cleaned first. Once you’re satisfied that the surface is clean, rinse thoroughly and move immediately to the next step.
The key thing here is speed. Cast iron rusts incredibly fast when wet. We’re talking within minutes under the right conditions. So the moment your skillet is clean, you need to dry it right away — don’t leave it sitting in the sink or on the counter dripping. Pat it dry with a clean towel and then move straight to drying it on the stove.
Step 2: Dry It Completely on the Stovetop
This step is non-negotiable and one that a lot of beginner cast iron cooks skip. Even after towel-drying, there’s still moisture hiding in the pores of the metal. Place your skillet on the stovetop over medium heat for about 5 to 10 minutes. You’ll see the water evaporate — sometimes you’ll even see faint wisps of steam rising from the surface. That’s exactly what you want to see happen. Keep it on the heat until the pan looks completely matte and dry with zero moisture visible.
This step also serves a second purpose: heating the cast iron opens up its pores slightly, which helps the oil you’re about to apply penetrate deeper into the metal surface. Think of it like prepping a canvas before painting. A warm, dry surface is going to accept the seasoning oil much more effectively than a cold or damp one, and that difference shows up in the final result — better adhesion, more durable seasoning, and faster build-up of those coveted dark layers over time.
Step 3: Choose the Right Oil
This is where a lot of people go wrong, and it’s worth spending a minute on. The best oils for cast iron seasoning have a high smoke point and a relatively low level of saturated fat. Flaxseed oil was trendy for a while, but it actually tends to flake off over time due to its polymerization properties. Skip it. The best options are: refined grapeseed oil, vegetable shortening (like Crisco), canola oil, or plain vegetable oil. These all work beautifully and are affordable and easy to find.
Some people swear by Crisco for its thick, even coverage, and there’s real merit to that — it’s been used for cast iron seasoning for decades. But honestly, refined grapeseed oil is my personal favorite. It has a smoke point of around 420°F, spreads in an incredibly thin layer, and produces a very hard, durable finish after baking. Avoid olive oil, butter, or unrefined coconut oil for seasoning — their smoke points are too low and they can leave a sticky or gummy surface that’s actually harder to cook on.
Whatever oil you choose, the golden rule is this: less is always more. You want the thinnest possible layer of oil on the surface. More on exactly how to apply it in the next step.
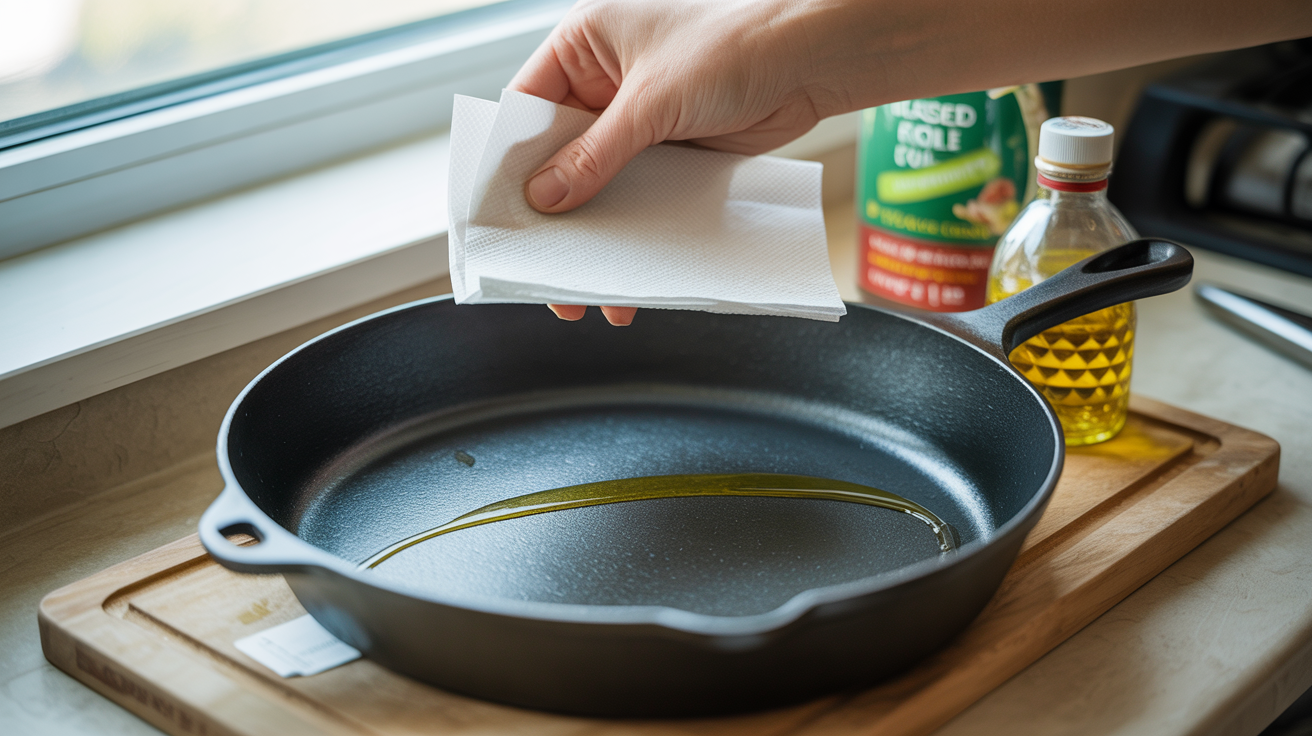
Step 4: Apply a Paper-Thin Layer of Oil
Pour just a tiny amount of your chosen oil — we’re talking about a half-teaspoon or less — onto the surface of the still-warm skillet. Using a clean lint-free cloth or a paper towel folded several times, rub the oil all over the entire surface: the inside cooking surface, the outside of the pan, the handle, and even the bottom. Every single surface needs to be coated.
Now here’s the critical part: after coating everything, take a fresh dry paper towel and wipe the entire pan down as if you’re trying to remove the oil. I know that sounds counterintuitive, but this is the most important technique in the whole process. What you’re doing is removing all the excess oil, leaving only an incredibly thin, almost invisible layer behind. If you leave too much oil on the surface, it will pool during baking and create sticky, gummy spots that are a nightmare to deal with. The coating should look almost like nothing is there — the pan should look nearly dry to the eye.
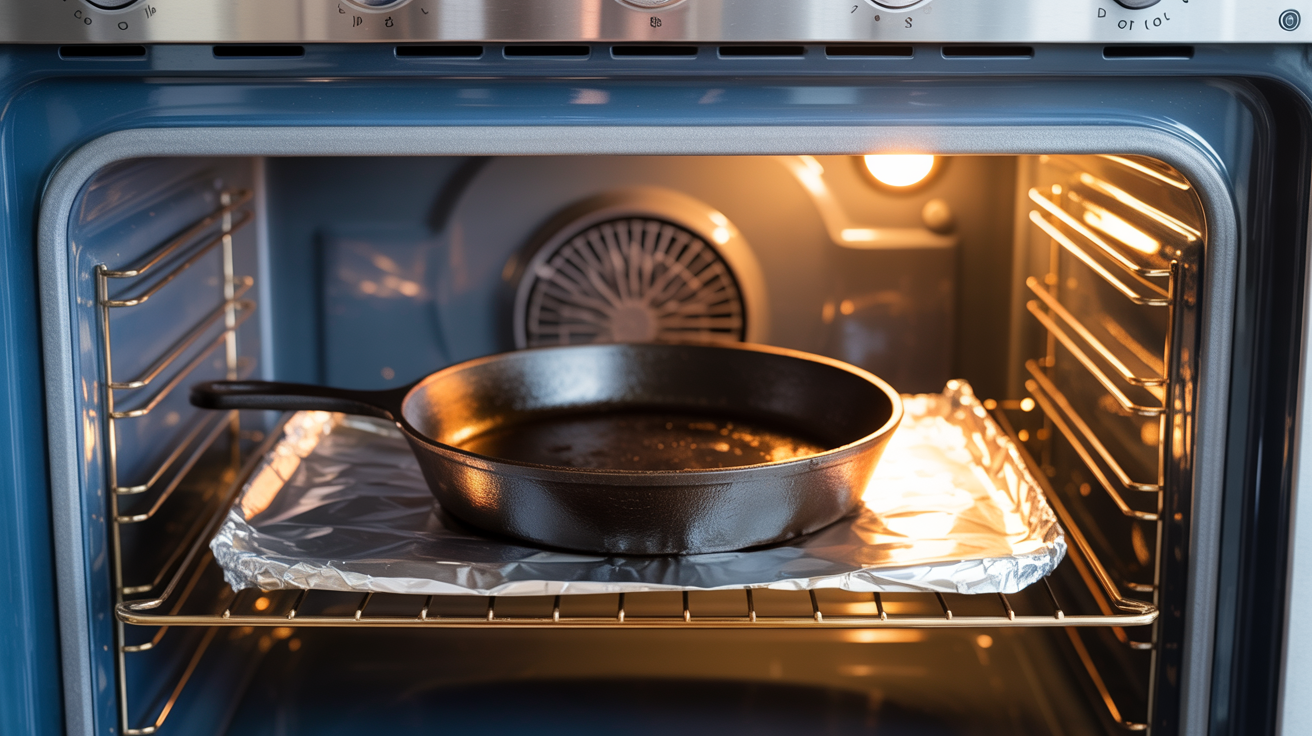
Step 5: Bake It Upside Down in the Oven
Preheat your oven to 450°F to 500°F. This high temperature is essential — it needs to be above the smoke point of your oil so that the oil can polymerize properly, bonding to the metal and forming that hard, slick seasoning layer rather than just baking on as a soft coating. Place the skillet upside down on the middle oven rack. This position lets any excess oil drip off rather than pooling in the pan and creating uneven spots.
Put a sheet of aluminum foil or a baking sheet on the rack below to catch any drips. Bake for one full hour. Don’t open the oven repeatedly or cut the time short — the full hour at high heat is what creates proper polymerization. When the hour is up, turn the oven off and let the pan cool completely inside the oven with the door closed. This slow cooling process helps the seasoning bond even more firmly to the metal. Pulling it out too soon and letting it cool rapidly on the counter can cause the seasoning to crack or separate.
Step 6: Repeat the Process at Least 3 to 4 Times
One round of seasoning is a start, but it’s not enough. A truly well-seasoned skillet has multiple thin layers of polymerized oil built up over time, and you can jump-start that process by repeating the oil-and-bake cycle three to four times in a row before you ever cook with the pan. Each layer adds more depth, more darkness, and more non-stick performance. The difference between a pan with one layer and a pan with four layers is immediately noticeable when you start cooking.
After your first bake-and-cool cycle, simply repeat Steps 4 and 5 — apply another paper-thin coat of oil, wipe off the excess, bake upside down at 450°F to 500°F for one hour, and cool in the oven. It takes a few hours total but the payoff is enormous. Once you’ve done three or four rounds, your pan should have a noticeably darker, more uniform color and a slight sheen that tells you the seasoning is building beautifully. After this initial seasoning process, regular cooking with fats will continue building the seasoning naturally over time.
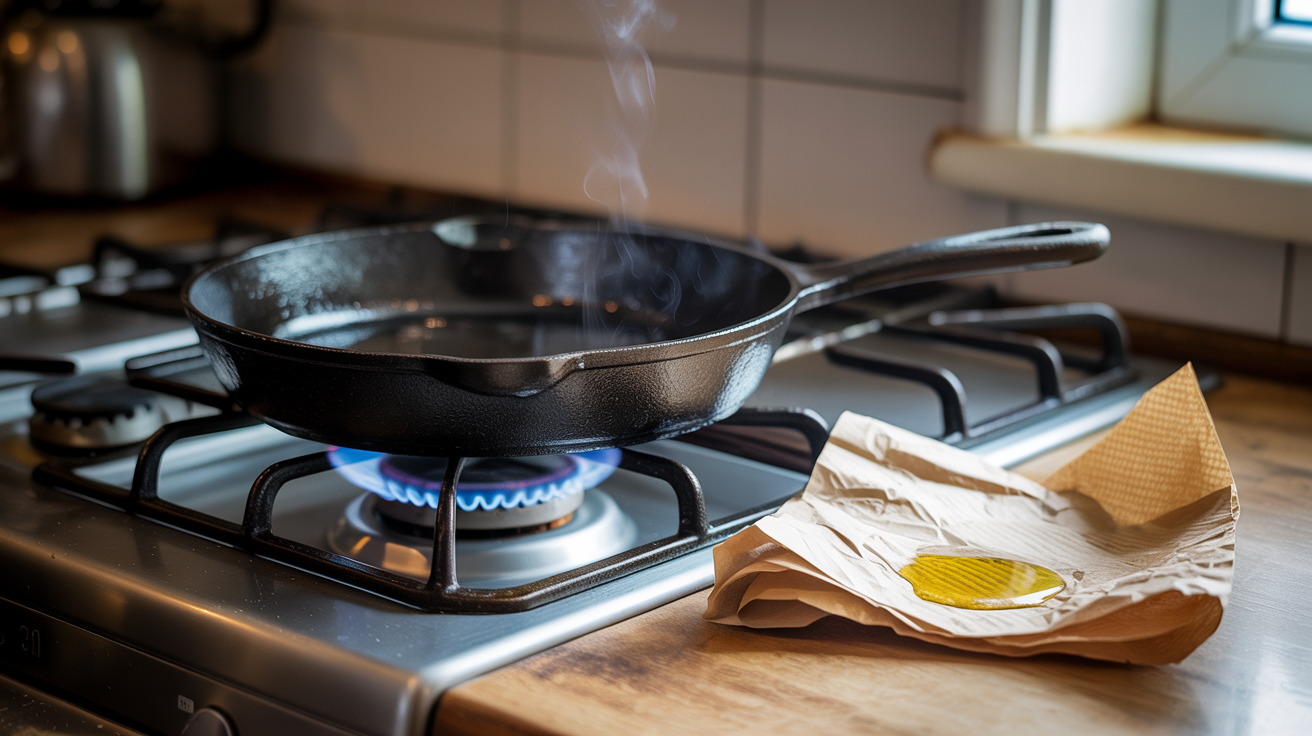
Step 7: Maintain Your Seasoning With Proper Everyday Care
Seasoning a cast iron skillet isn’t a one-time event — it’s an ongoing relationship. After each use, clean the pan while it’s still warm (not scalding hot) using hot water and a stiff brush or a chainmail scrubber. Avoid soaking it in water, avoid the dishwasher, and avoid letting it air dry. After rinsing, dry it immediately with a towel and then put it back on the stove over low heat for a minute or two to evaporate every last drop of moisture.
Once it’s dry, apply the thinnest possible layer of oil — just a tiny wipe down with a lightly oiled paper towel — before storing it. Over time, especially if you cook bacon, fry things in oil, or sauté with butter, your seasoning will keep building naturally with each use. Foods that accelerate rust or strip seasoning include highly acidic things like tomato sauce, lemon juice, and vinegar — use those sparingly in your cast iron, especially in the early stages before you’ve built up serious layers. Treat it right, and your cast iron skillet will reward you with decades of incredible cooking.
Frequently Asked Questions
Can I use soap to clean my cast iron skillet?
Yes, occasionally — especially for the initial cleaning before first seasoning. A small amount of mild dish soap used once in a while won’t destroy your seasoning, but avoid making it a habit after you’ve built up good layers. Hot water and a stiff brush or chainmail scrubber handle everyday cleaning perfectly without soap.
Why does my cast iron skillet feel sticky after seasoning?
Stickiness almost always means you used too much oil. The fix is to put the pan back in the oven at 450°F to 500°F for another hour — the extended heat will finish polymerizing the excess oil. Going forward, use a much thinner coat and wipe off all visible excess before baking.
How do I know when my cast iron is well-seasoned?
A well-seasoned cast iron will be dark brown to black, with a smooth (not rough) surface and a subtle sheen. Eggs should slide around fairly easily, and food shouldn’t stick excessively. It will also feel slightly slick rather than rough when you run a clean finger across the surface.
Can I season a cast iron skillet that’s completely rusted?
Absolutely. Use fine steel wool or a chainmail scrubber to remove all the rust down to bare metal, wash thoroughly, dry completely on the stovetop, and then follow the full seasoning process from Step 3 onward. Even heavily rusted pans can be fully restored with patience.
How often do I need to re-season my cast iron?
If you’re cooking regularly with fat and caring for it properly, your seasoning should maintain itself and even improve over time. You only need to do a full oven re-seasoning session if the surface looks patchy, dull, or starts to rust in spots. Otherwise, the quick post-cook oiling described in Step 7 is all the maintenance you need.
Seasoning cast iron is genuinely one of those kitchen skills that feels intimidating at first but becomes completely second nature once you’ve done it a couple of times. The payoff — a virtually non-stick, incredibly durable, endlessly repairable cooking surface that gets better with every use — is absolutely worth the few hours of initial effort. Follow these seven steps, be patient with the process, and you’ll have a cast iron skillet that you’ll honestly never want to cook without. Now go make something delicious in it.

2 Comments